So verbindest du Craft mit Visual Studio Code über MCP
Schritt-für-Schritt-Anleitung, um Craft-Dokumente über MCP mit Visual Studio Code zu verbinden. Lies, durchsuche und aktualisiere deine Notizen direkt aus Visual Studio Code.
Einen MCP-Konnektor in Visual Studio Code hinzufügen
Erstelle einen neuen Konnektor in Visual Studio Code und verwende die MCP-URL, um die beiden Dienste zu verbinden.
Schritt 1
>mcp in die Befehlspalette eingibst und „MCP: Open User Configuration“ auswählstSchritt 2
craft durch einen aussagekräftigen Namen für deinen MCP-Server. Ersetze <MCP_URL> durch die MCP-URL.{
"servers": {
"craft": {
"url": "https://mcp.craft.do/my/mcp"
}
}
}Schritt 3
Schritt 4
Du kannst Visual Studio Code jetzt nach deinen Dokumenten fragen und sie sogar aktualisieren lassen. Probiere zum Einstieg etwas wie Folgendes:
Klicke auf ein Beispiel, um den Prompt in die Zwischenablage zu kopieren
Ein paar Ideen für den Einstieg
Beispiele durchsuchen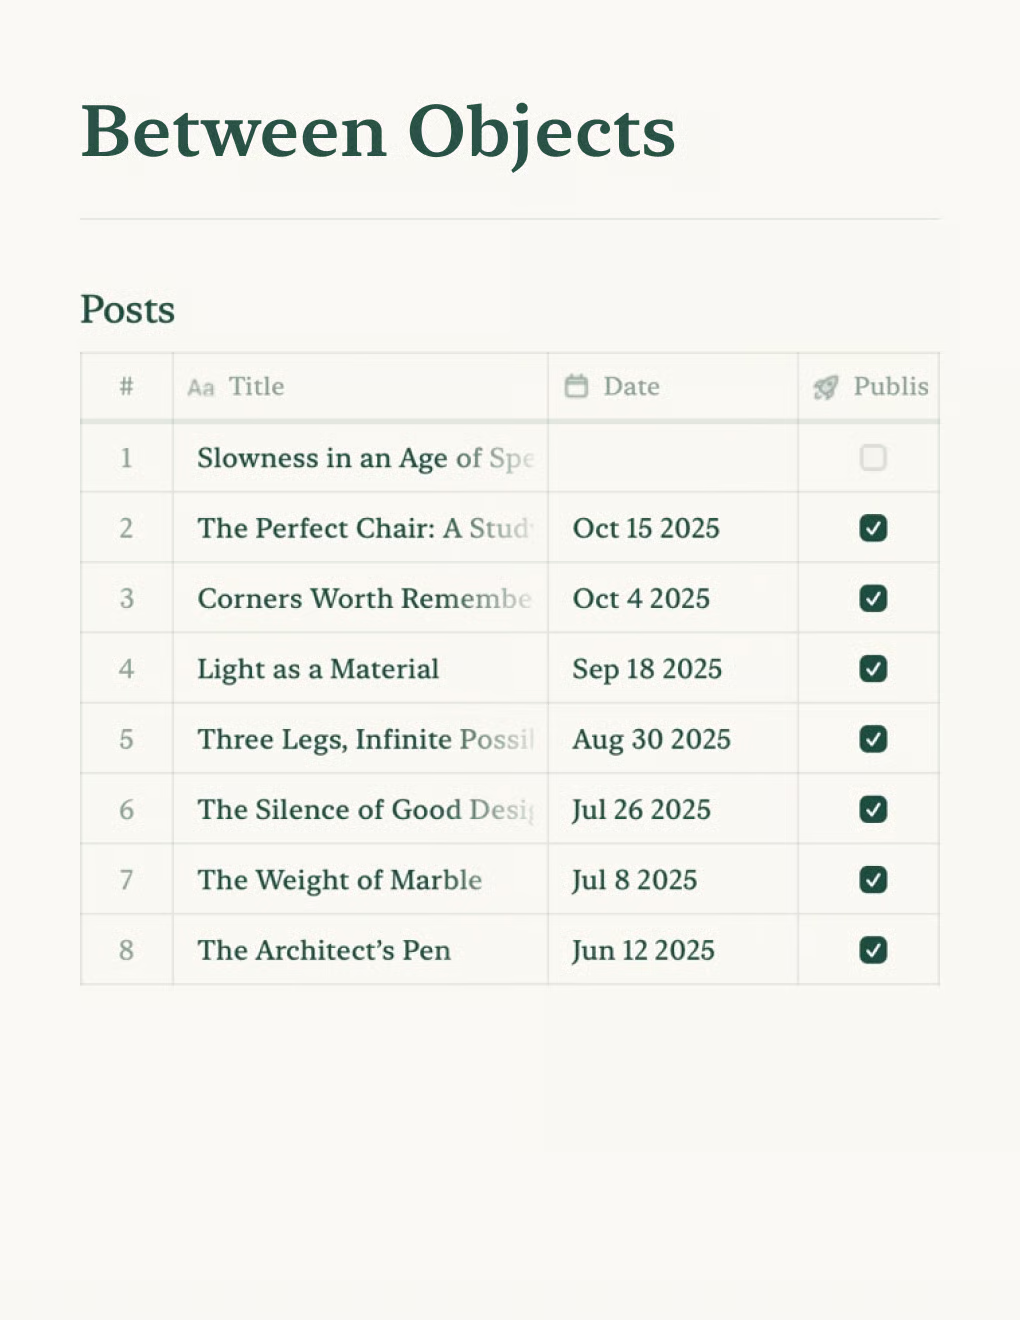
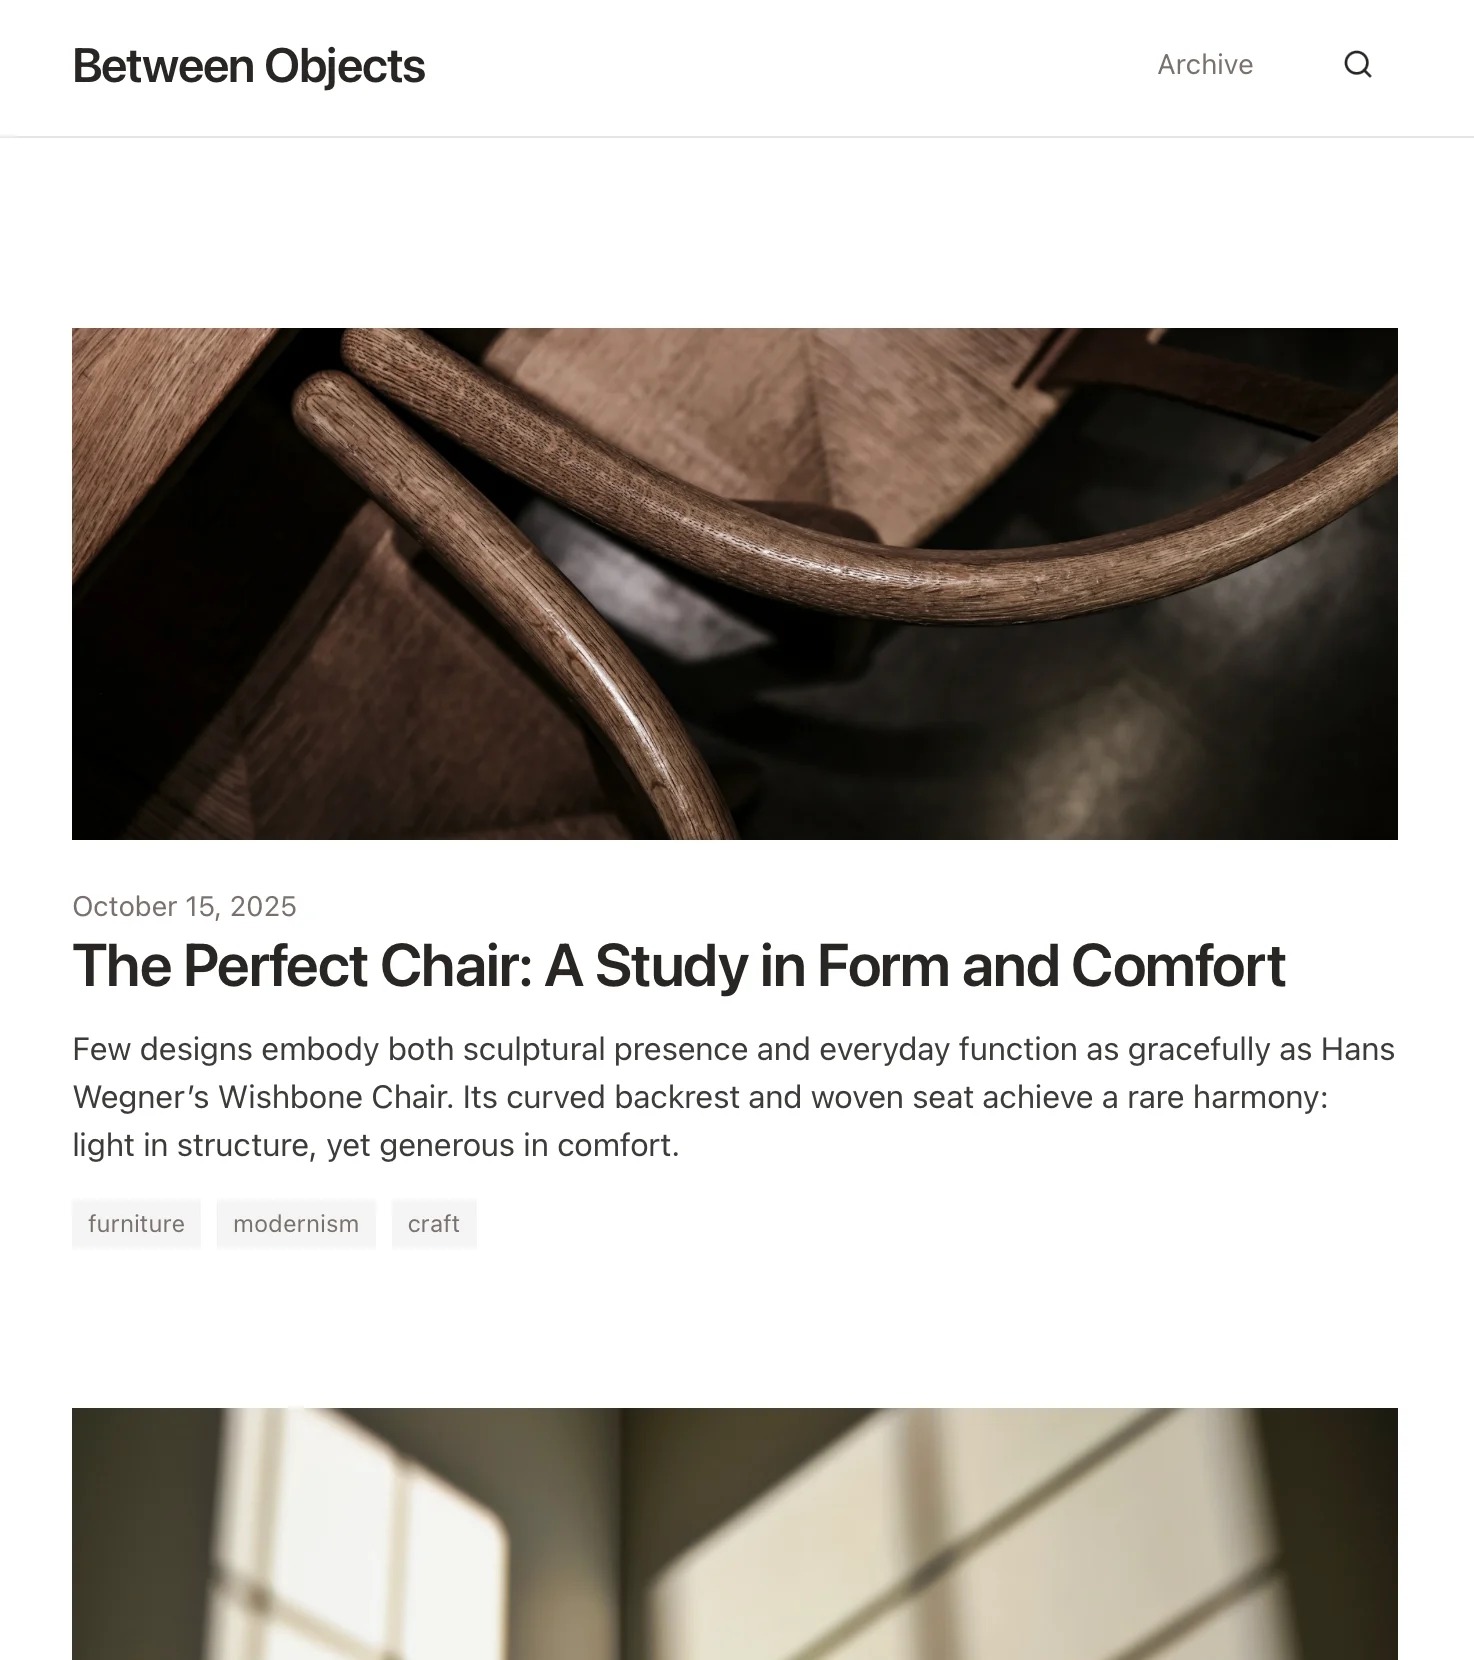
Erstelle einen persönlichen Blog mit Craft-Dokumenten. Inhalte werden automatisch per API synchronisiert – veröffentliche direkt aus deiner Notiz-App.
Mehr erfahren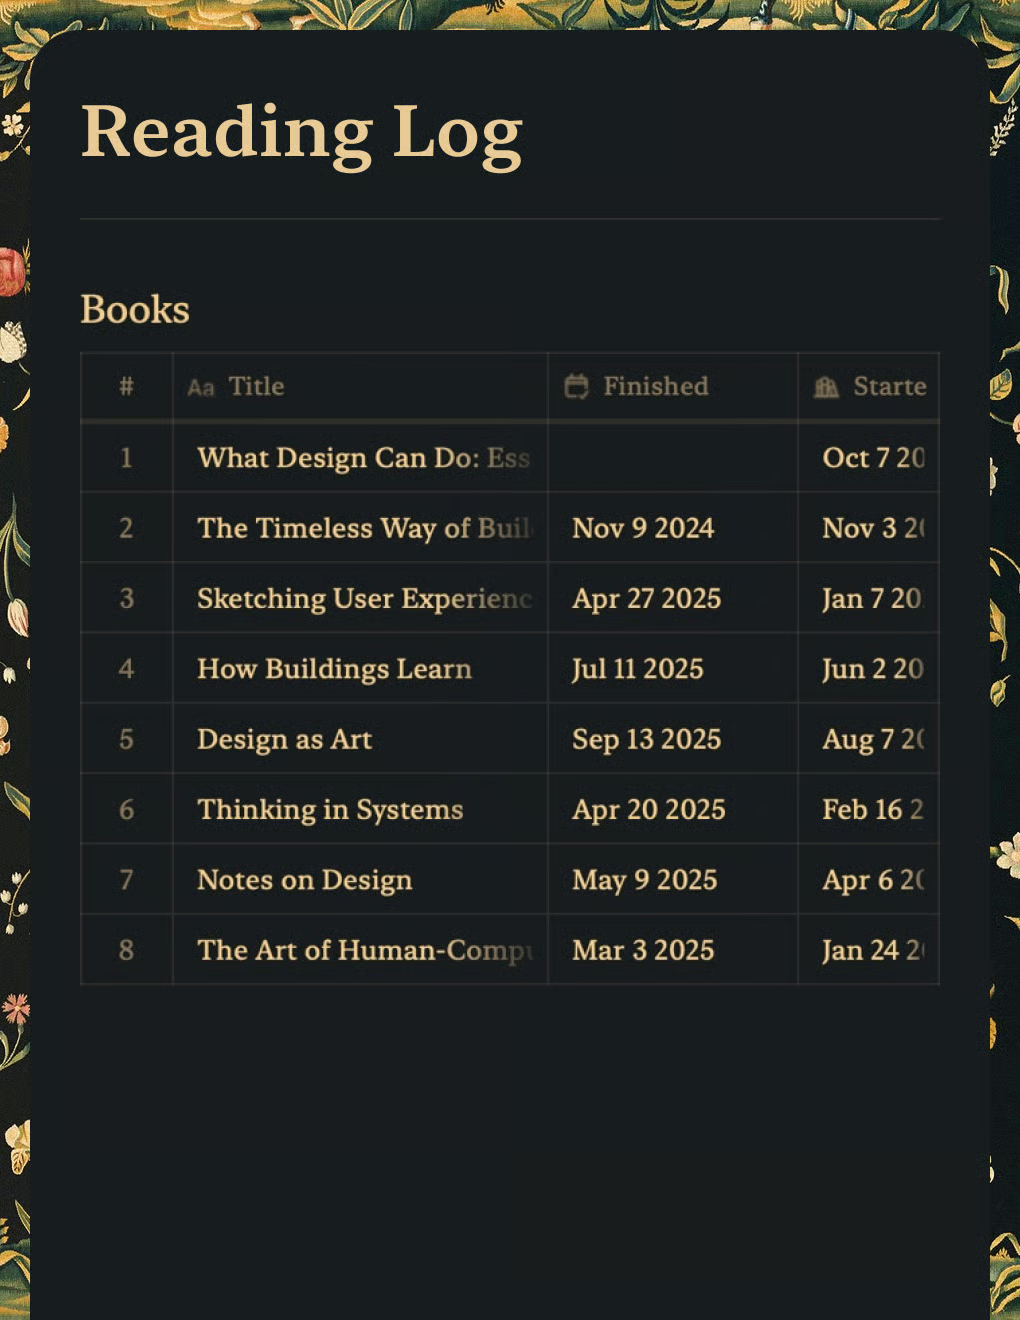
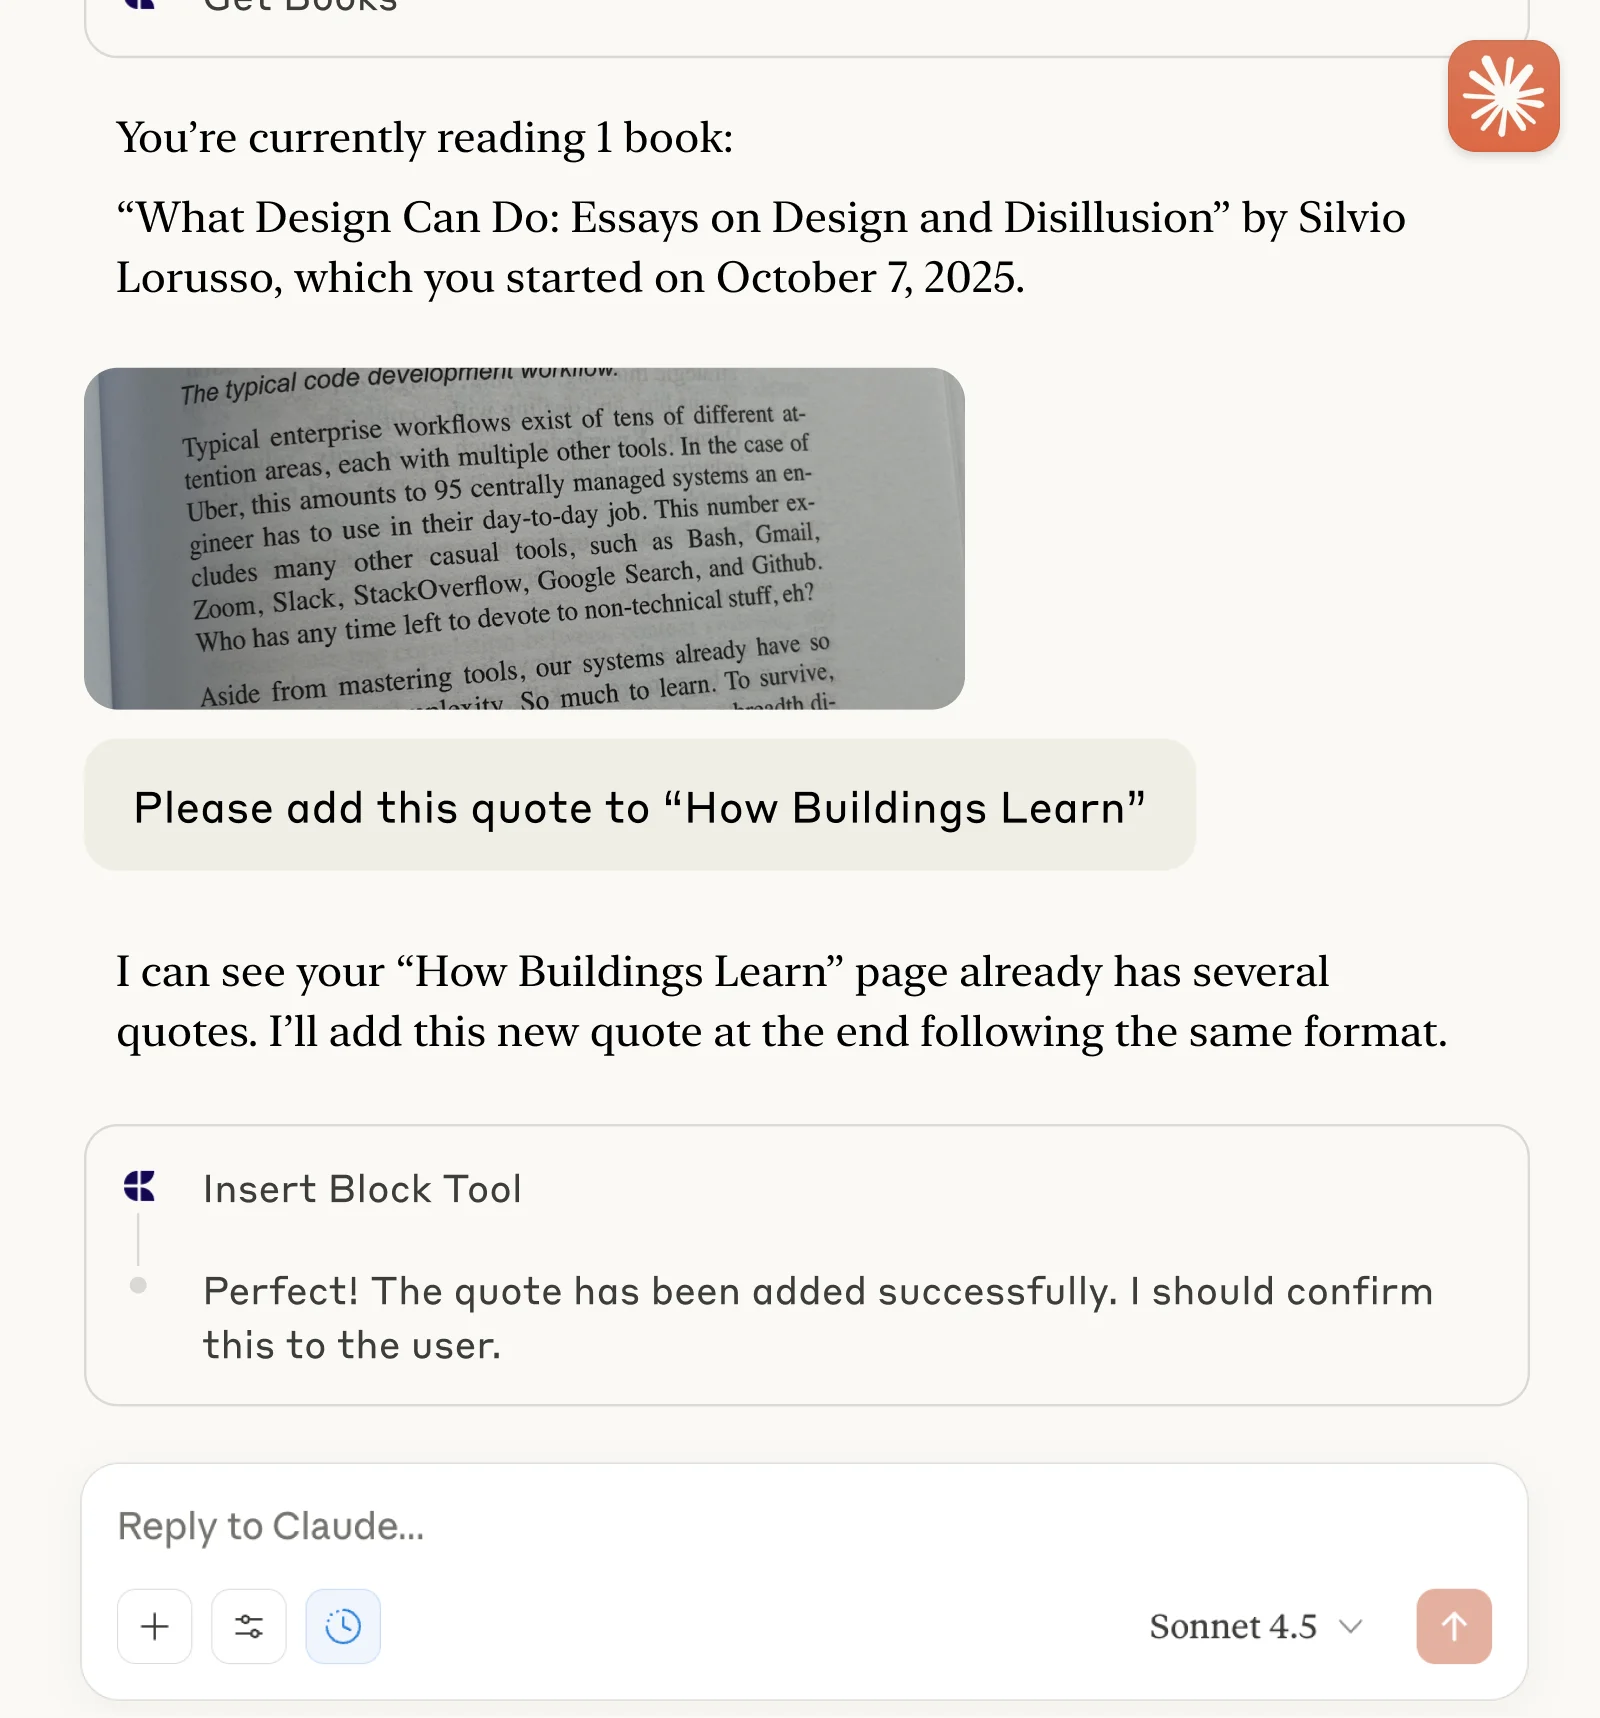
Verfolge Bücher und erfasse Zitate mit Claude oder ChatGPT über MCP.
Mehr erfahren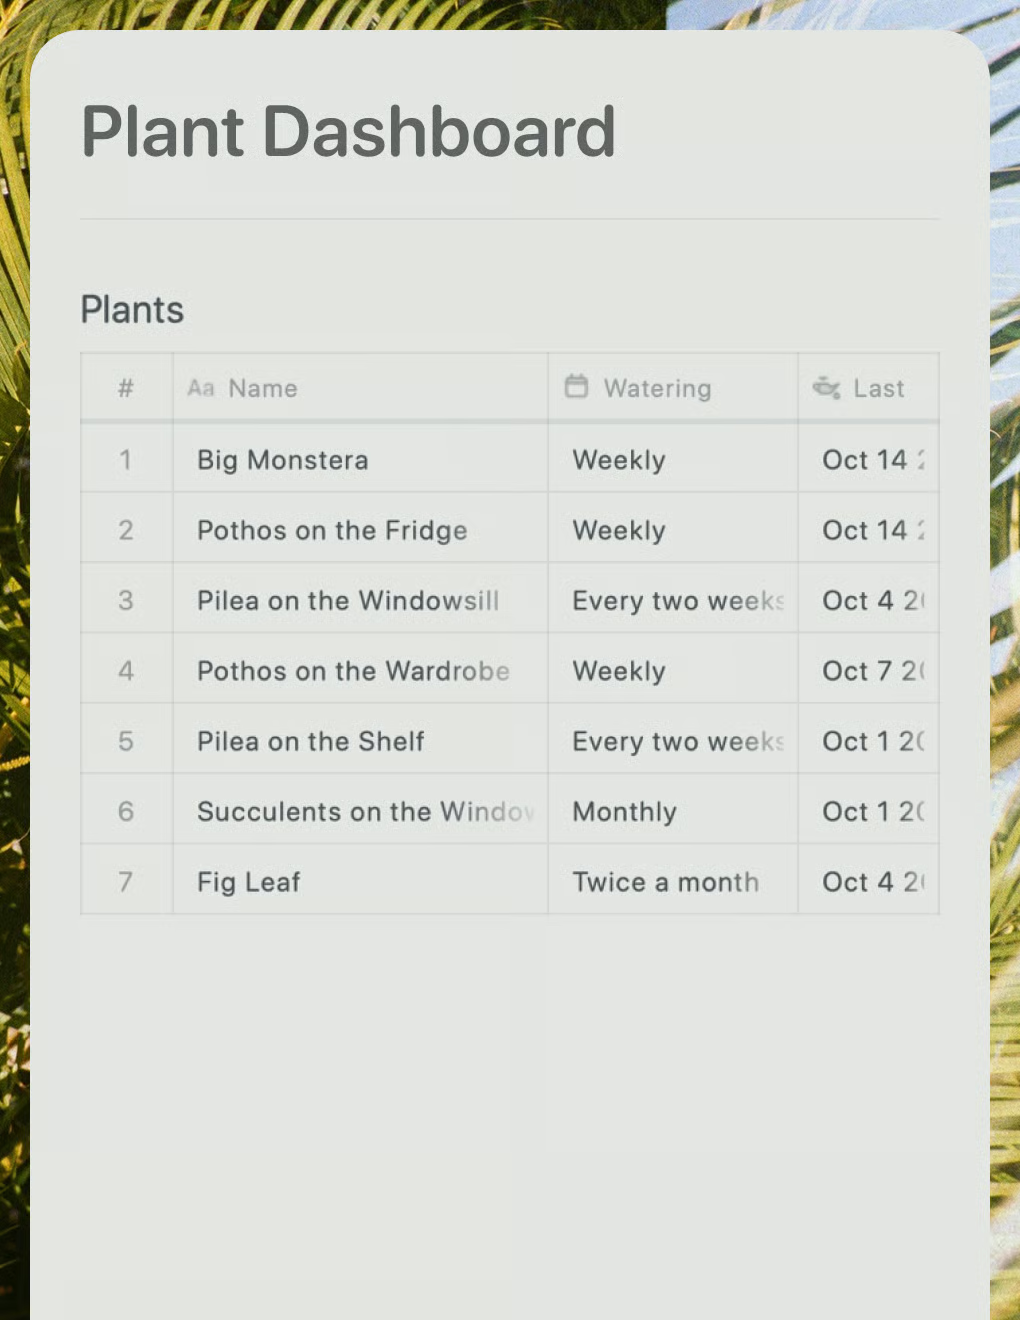
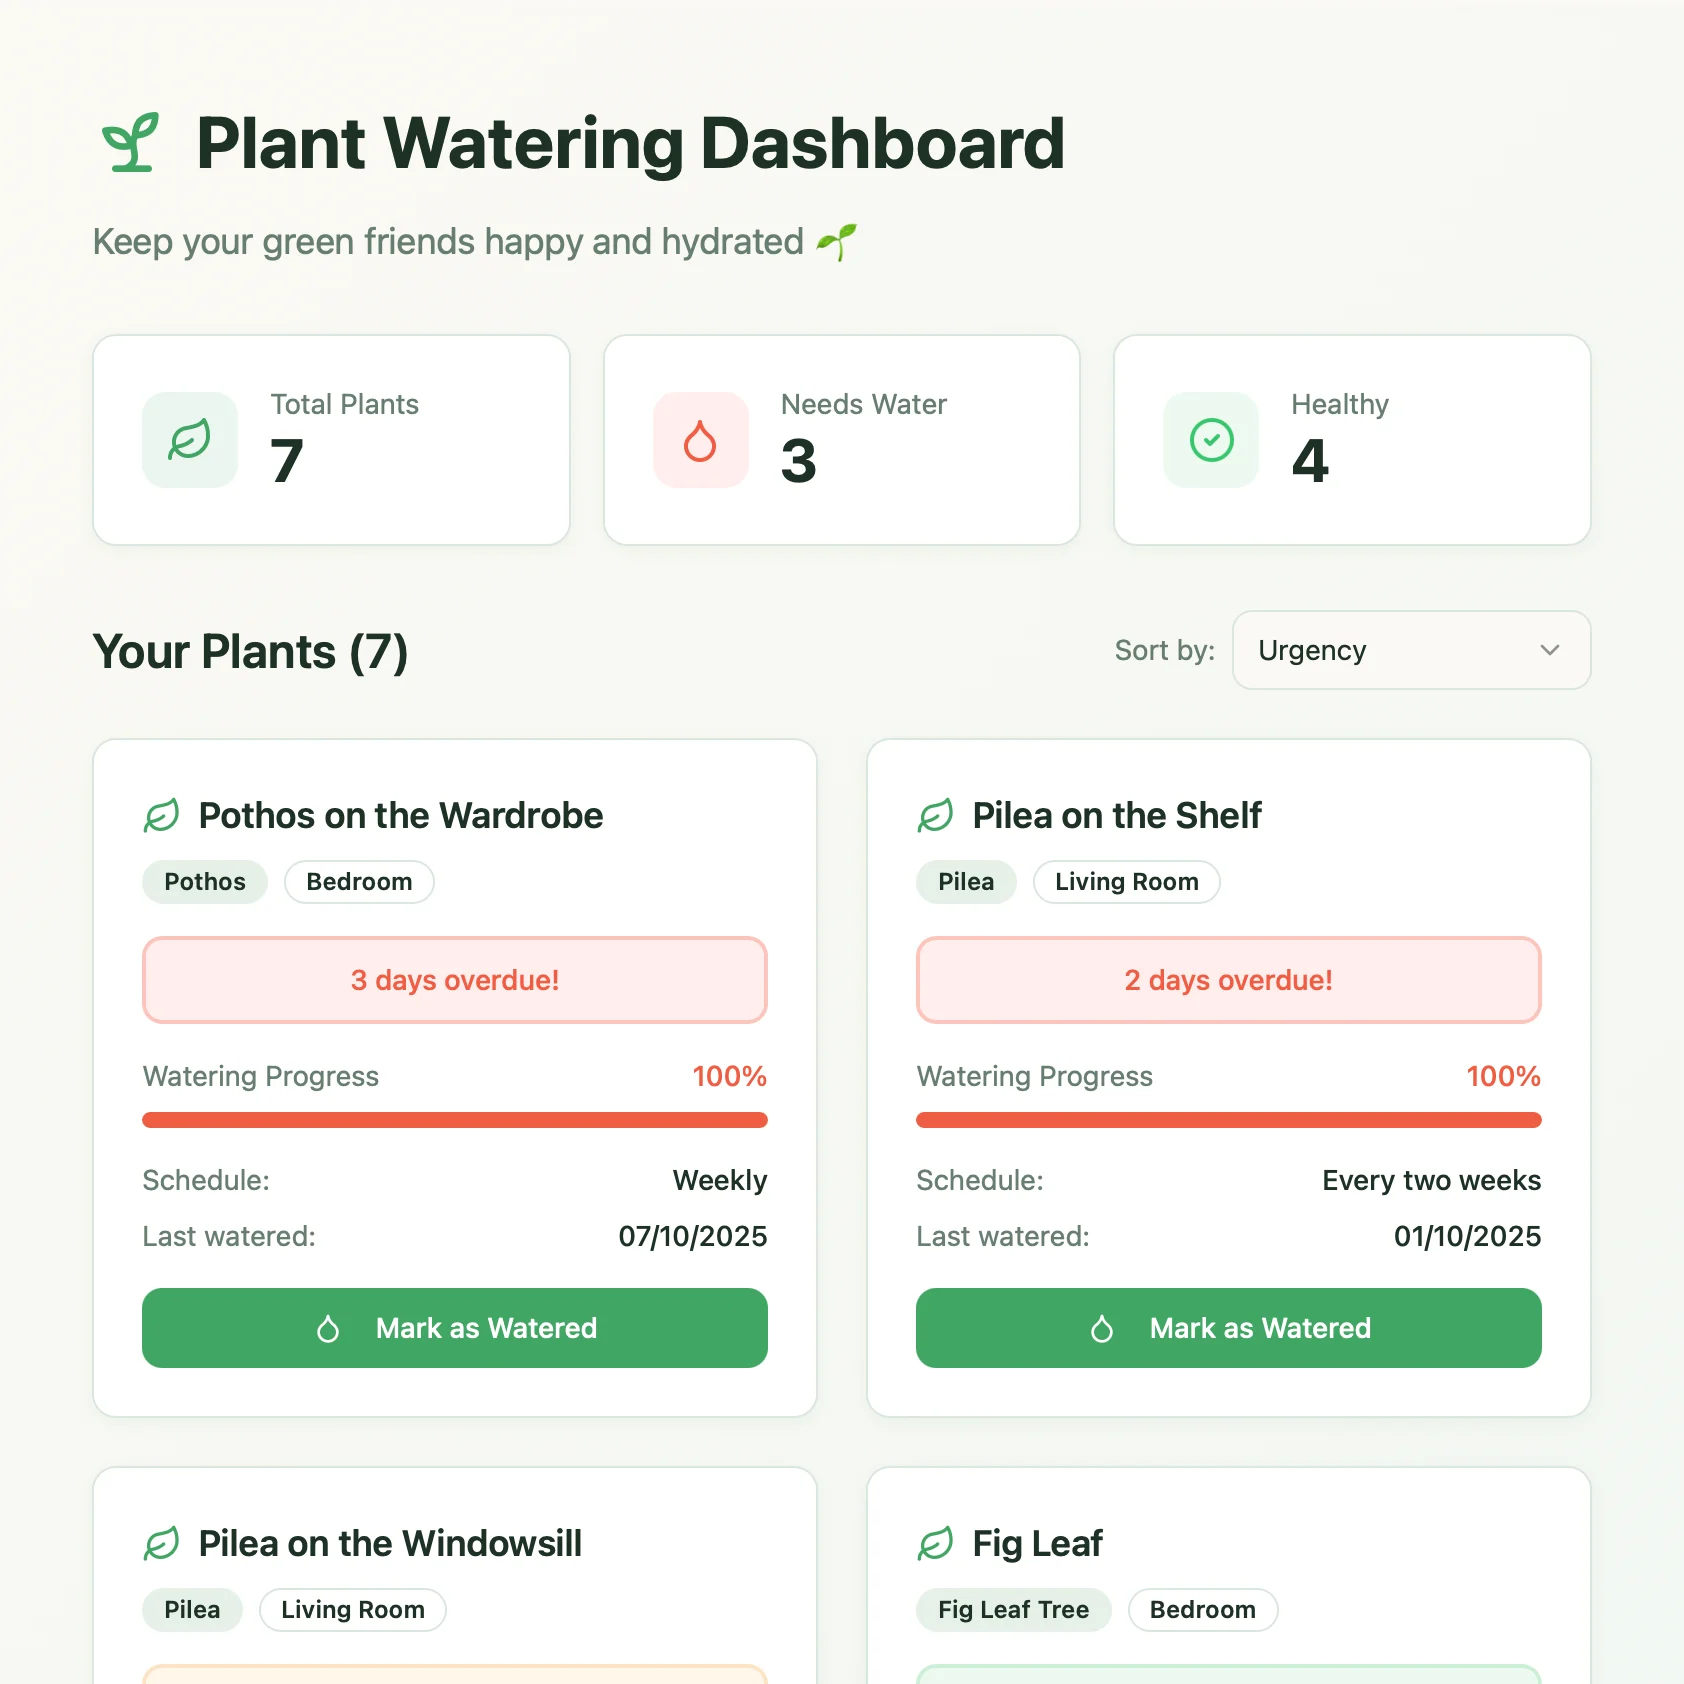
Ein Live-Pflanzenpflege-Dashboard, erstellt mit Lovable. Ruft Gießpläne und Pflegetipps aus deinem Craft-Dokument ab.
Mehr erfahren