在 ChatGPT 中添加 MCP 连接器
在 ChatGPT 中创建新的连接器,并使用 Craft 提供的 MCP URL 连接两个服务。
添加自定义应用需要 ChatGPT Pro、Plus、Business、Enterprise 或 Edu 订阅。在 Business、Enterprise 或 Edu 套餐中,需要管理员权限。
第 1 步
前往ChatGPT的设置 → Connectors,启用“开发者模式”开关,然后点击“Create app”按钮
复制此 URL 并将其粘贴到 URL 字段中:
https://mcp.craft.do/my/mcp第 2 步
为应用设定一个有意义的名称,然后粘贴 MCP URL。将 Authentication 下拉菜单设为“OAuth”,勾选同意复选框,然后点击“Create”。
第 3 步
浏览器窗口将打开,显示 Craft 授权页面。选择要连接的空间,然后单击“批准”以授予访问权限。
第 4 步
在聊天中,点击加号按钮,前往“More”并选择你刚创建的应用
第 5 步
你现在可以在此聊天中开始使用该应用了
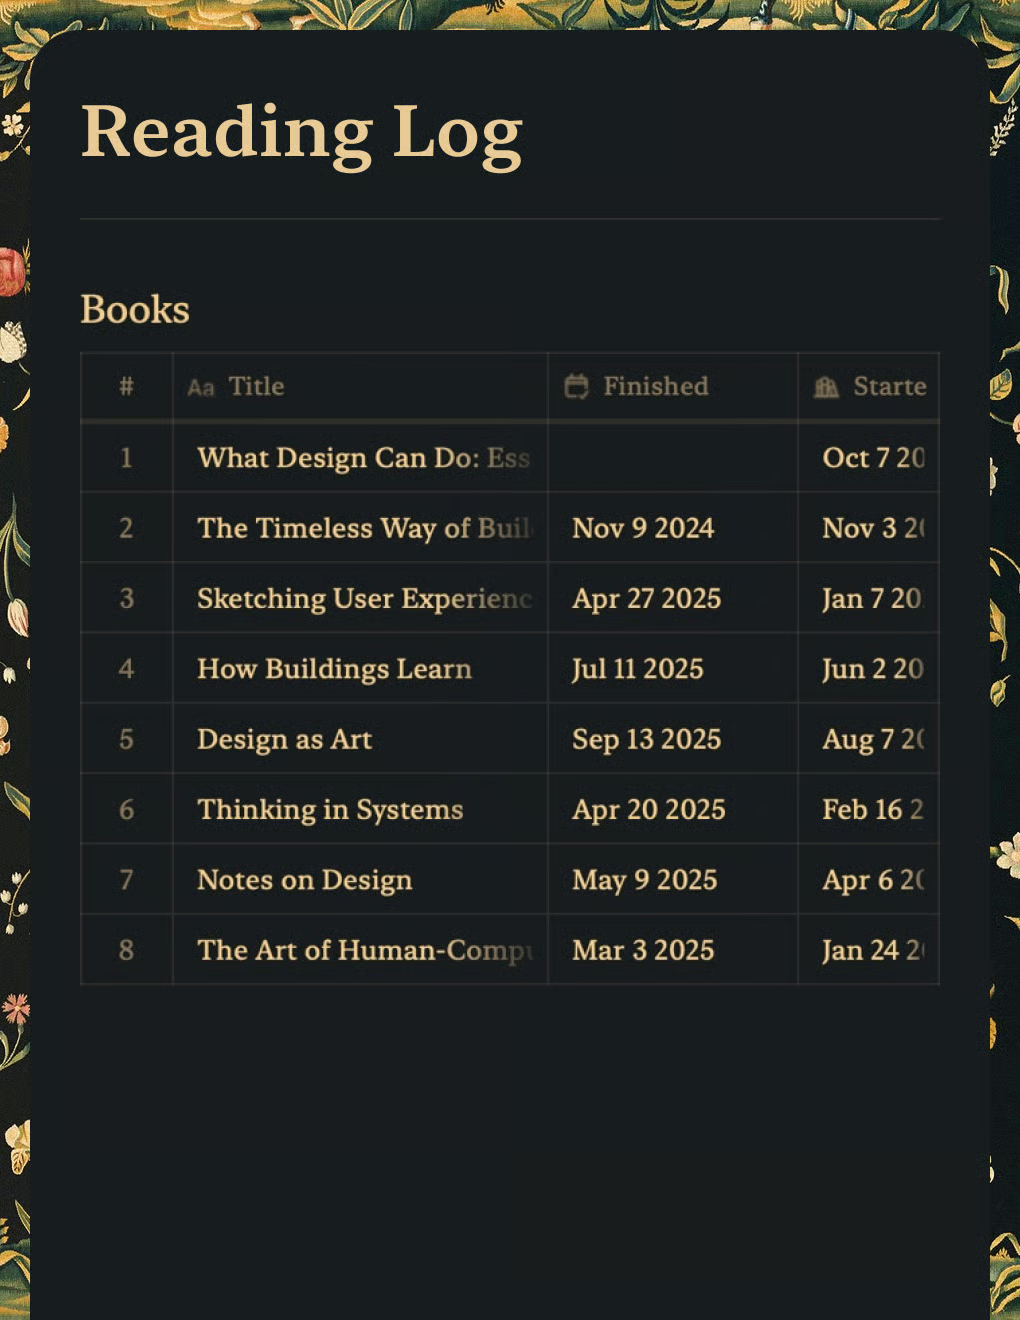
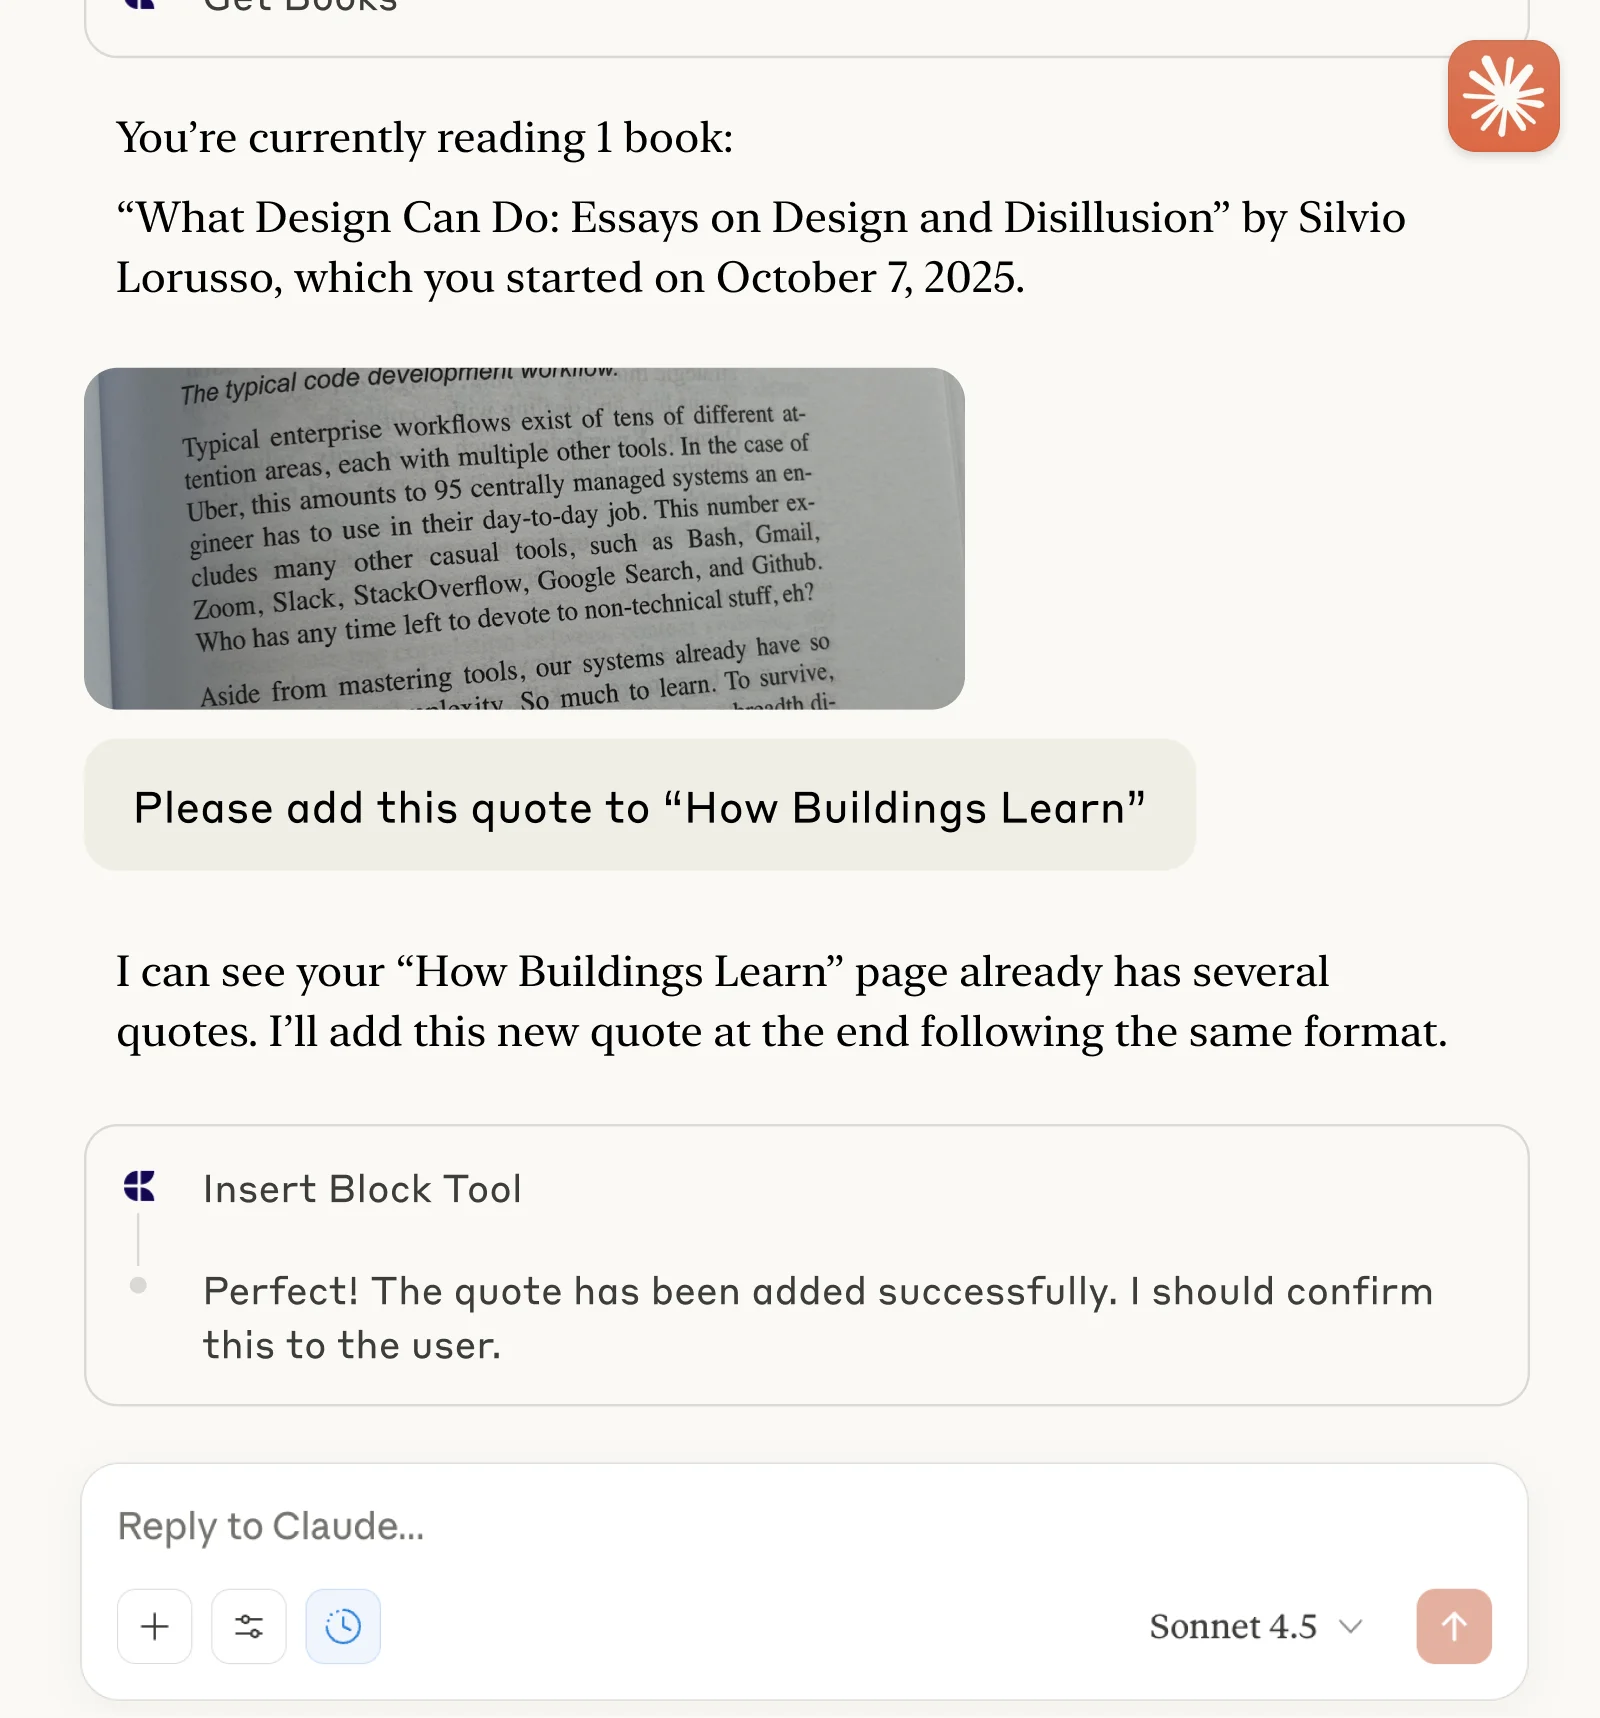
你现在可以向 ChatGPT 询问有关你的文档的问题,甚至可以让它更新文档。试试以下提示来开始吧:
点击示例即可将提示复制到剪贴板