Nhật ký giấc mơ
Ghi lại những giấc mơ của bạn và khám phá ý nghĩa ẩn giấu đằng sau chúng. Ghi chép từng giấc mơ thông qua ứng dụng web tùy chỉnh và sử dụng ChatGPT hoặc Claude để giải mã ý nghĩa biểu tượng và cảm xúc.
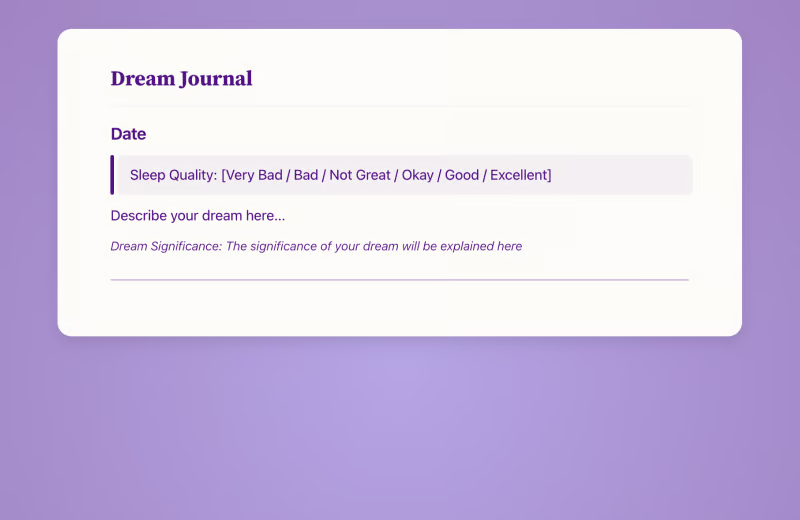
Bản demo trực tiếp
Ví dụ thực tế này cho thấy tài liệu Craft và ứng dụng Lovable trông như thế nào:
Chức năng ghi đã bị vô hiệu hóa trong bản demo
Được xây dựng với Craft, Lovable và ChatGPT hoặc Claude
Tự xây dựng
Trong ví dụ này, chúng ta sẽ sử dụng Craft để ghi nhật ký giấc mơ cá nhân. Chúng ta sẽ xây dựng một ứng dụng web nhỏ để ghi lại giấc mơ của mình, sau đó nhờ ChatGPT hoặc Claude đưa ra lời giải thích cho từng giấc mơ.
Bước 1 — Tạo tài liệu của bạn
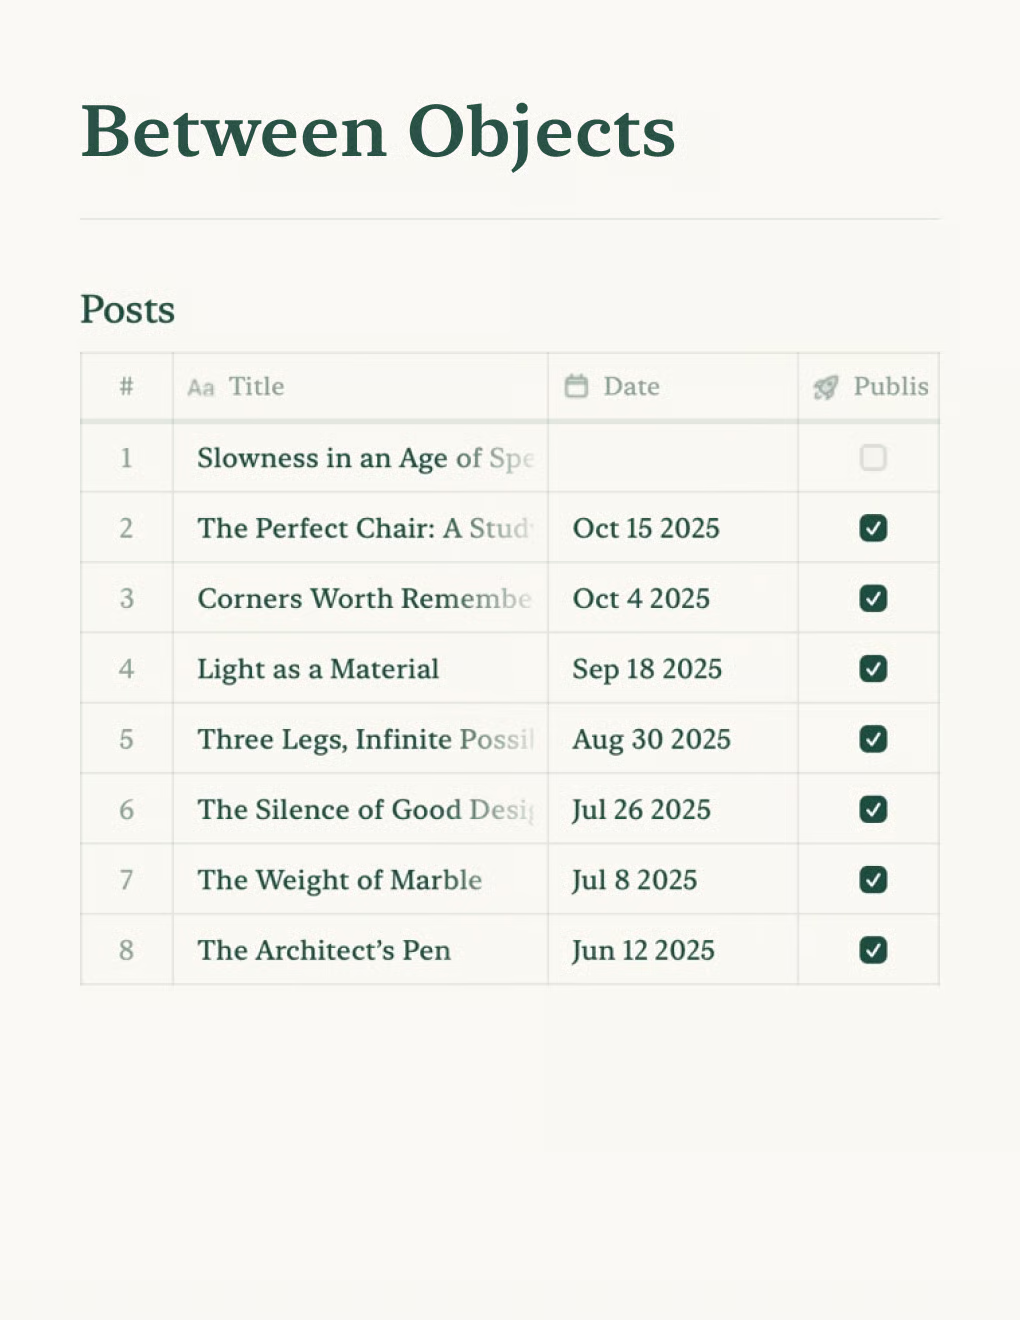
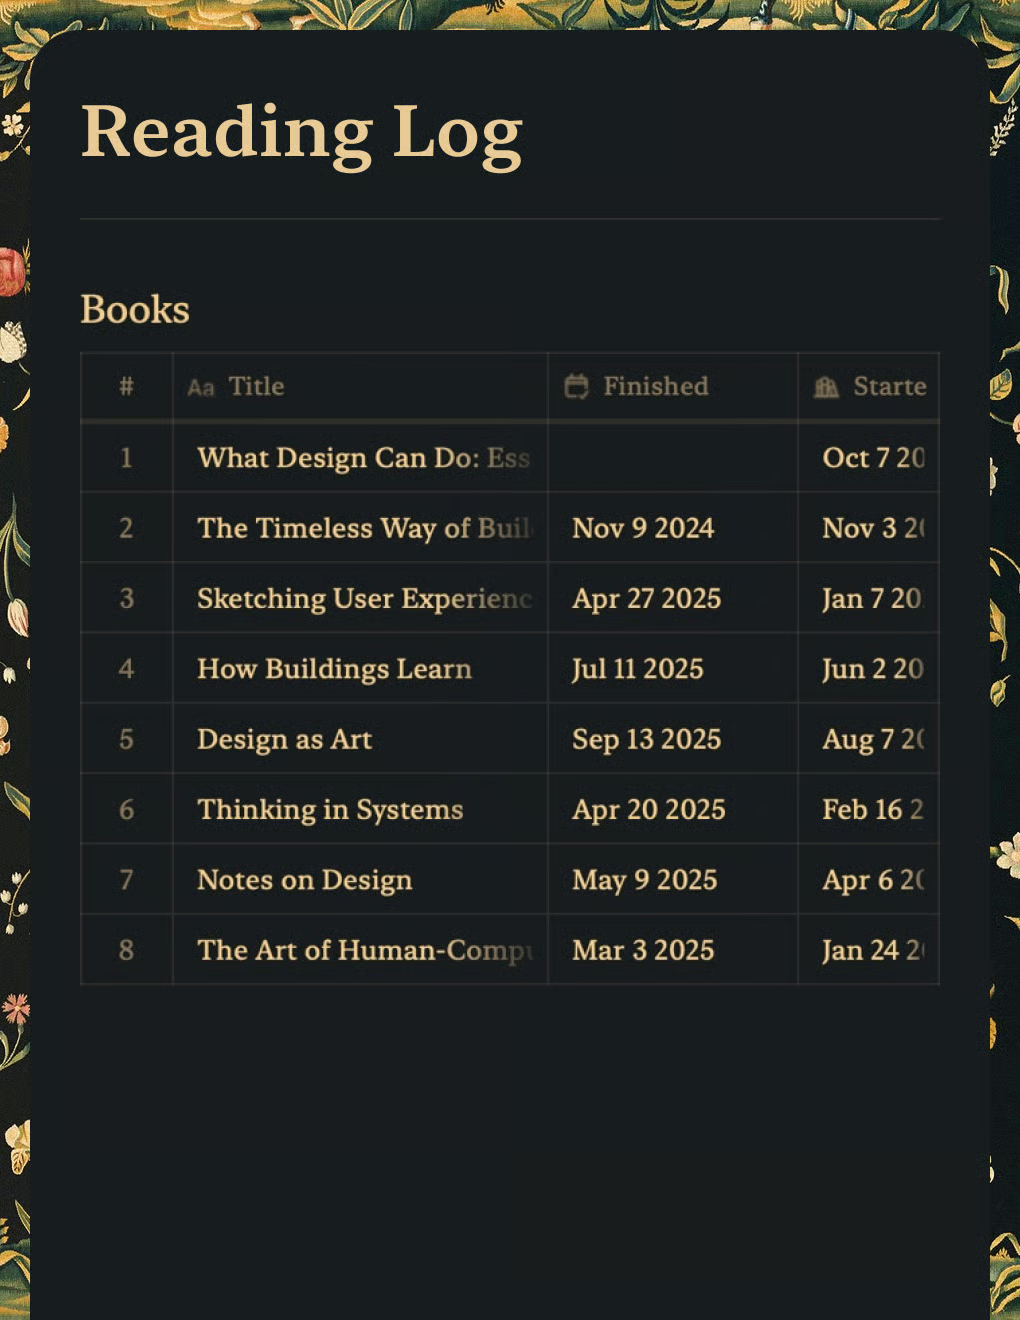
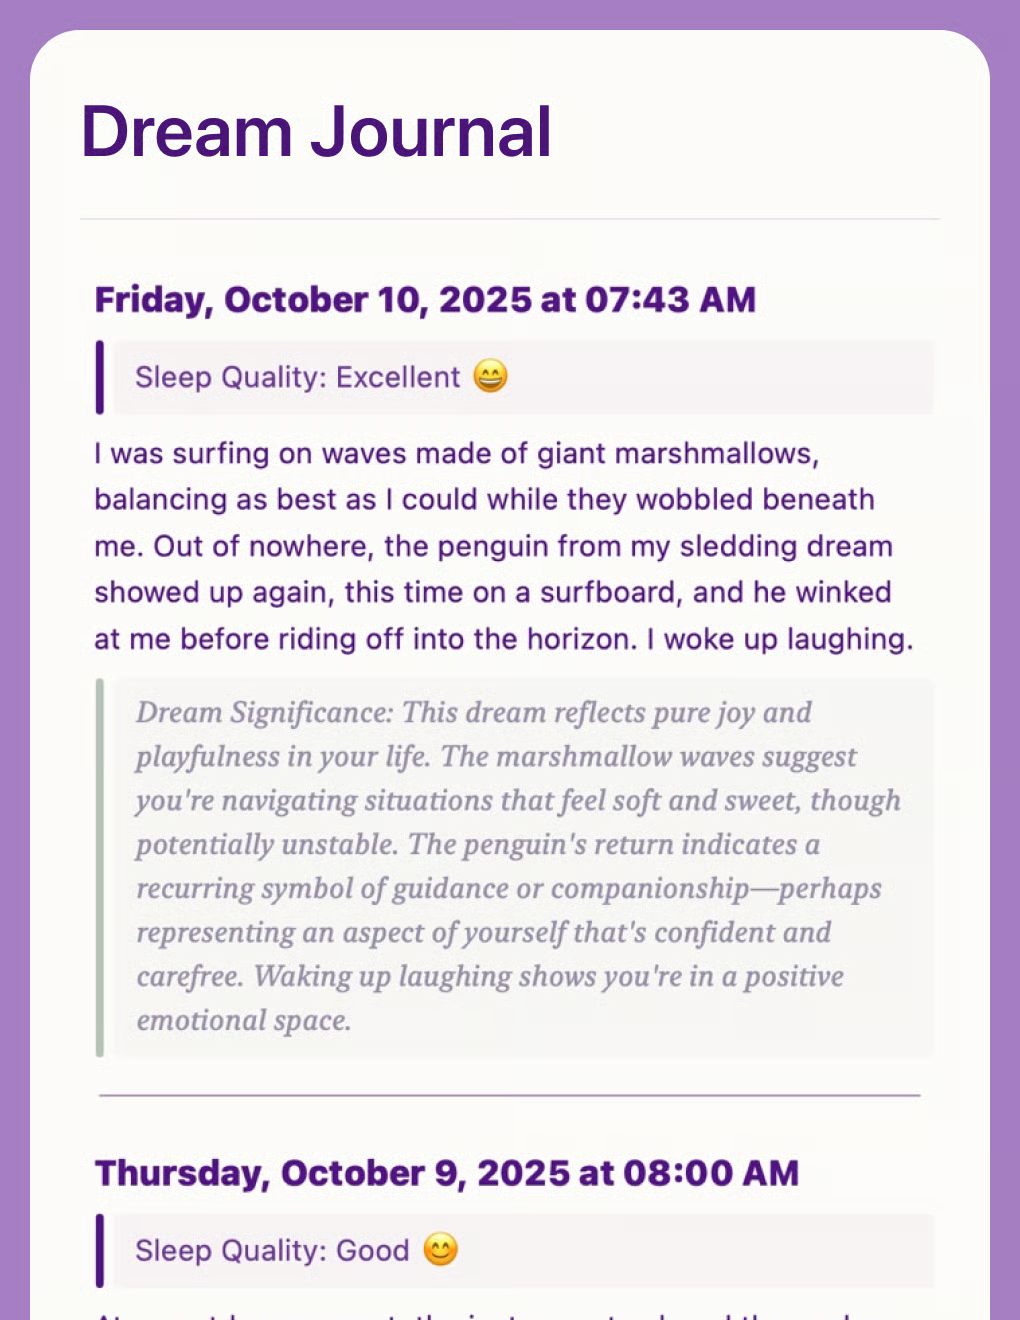
Mẫu nhật ký giấc mơ của chúng ta cực kỳ đơn giản: Chúng ta chỉ cần thêm mỗi giấc mơ mới vào đầu trang, với ngày tháng làm tiêu đề và một số thông tin bổ sung ở phía dưới.
Sử dụng mẫu này để tạo tài liệu mới cho nhật ký giấc mơ của bạn:
Bước 2 — Cho phép truy cập API
Kích hoạt quyền truy cập API cho tài liệu của bạn để nhận được một URL duy nhất có thể được sử dụng để đọc và thêm dữ liệu vào tài liệu, ví dụ như bởi ứng dụng web mà chúng ta sẽ xây dựng bên dưới.
Bước 1
Bước 2
Bước 3
Bước 4
Bước 5
Bước 6
Bước 3 — Xây dựng với Lovable
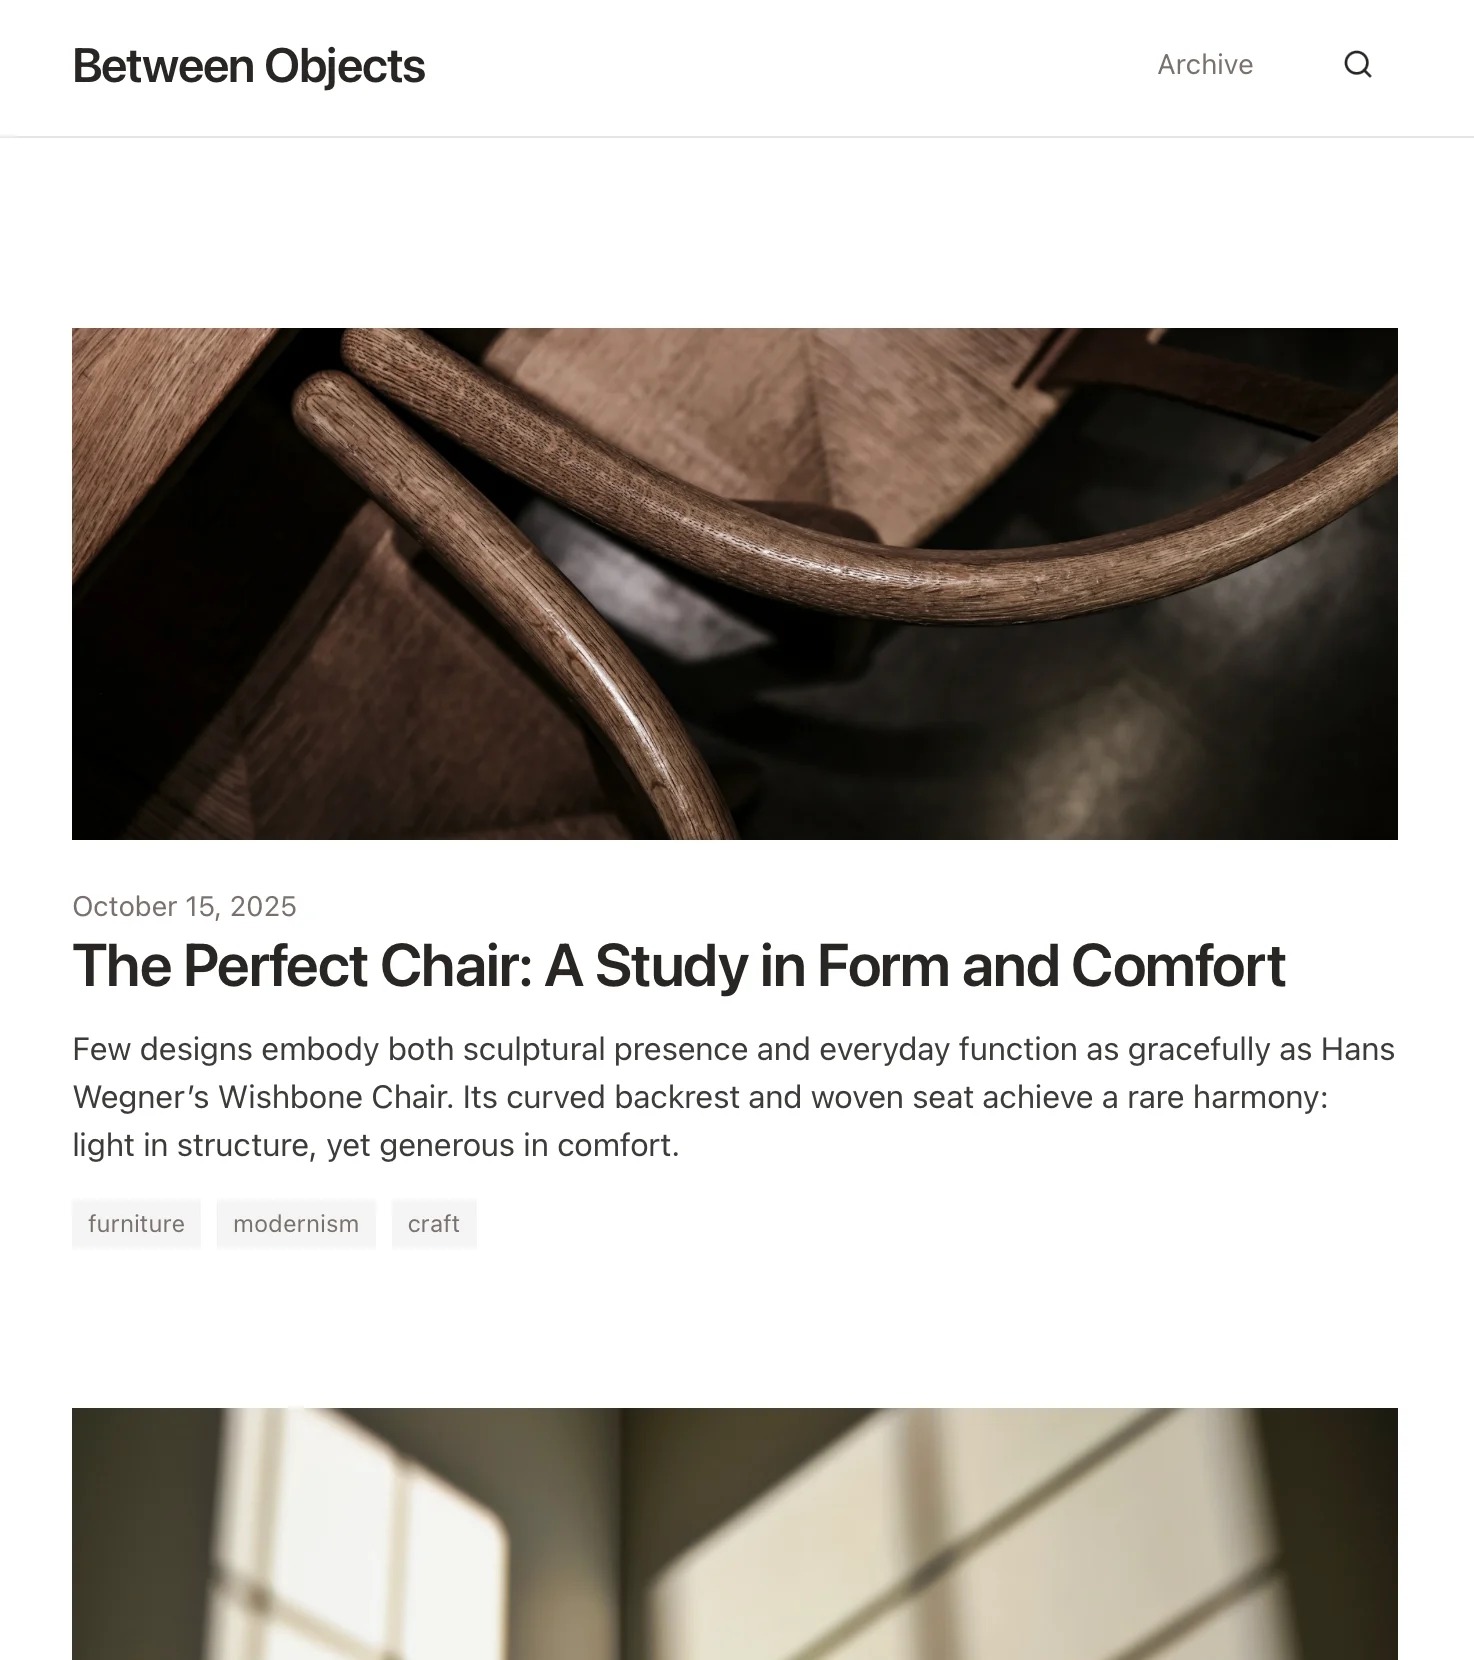
Bây giờ chúng ta hãy tiếp tục xây dựng trang web thực tế cho bảng điều khiển của mình trên Lovable. Đối với trang web ví dụ được hiển thị ở trên, chúng ta đã sử dụng gợi ý này:
Tôi đang tạo một nhật ký giấc mơ để ghi chép và phân tích các giấc mơ của mình.
Thông tin được lưu trữ trong Craft. Vui lòng kiểm tra tệp đính kèm, bao gồm ví dụ về trạng thái hiện tại của tài liệu Craft Nhật ký Giấc mơ của tôi, cũng như thông tin về API mà bạn nên sử dụng để lưu thông tin về giấc mơ của tôi.
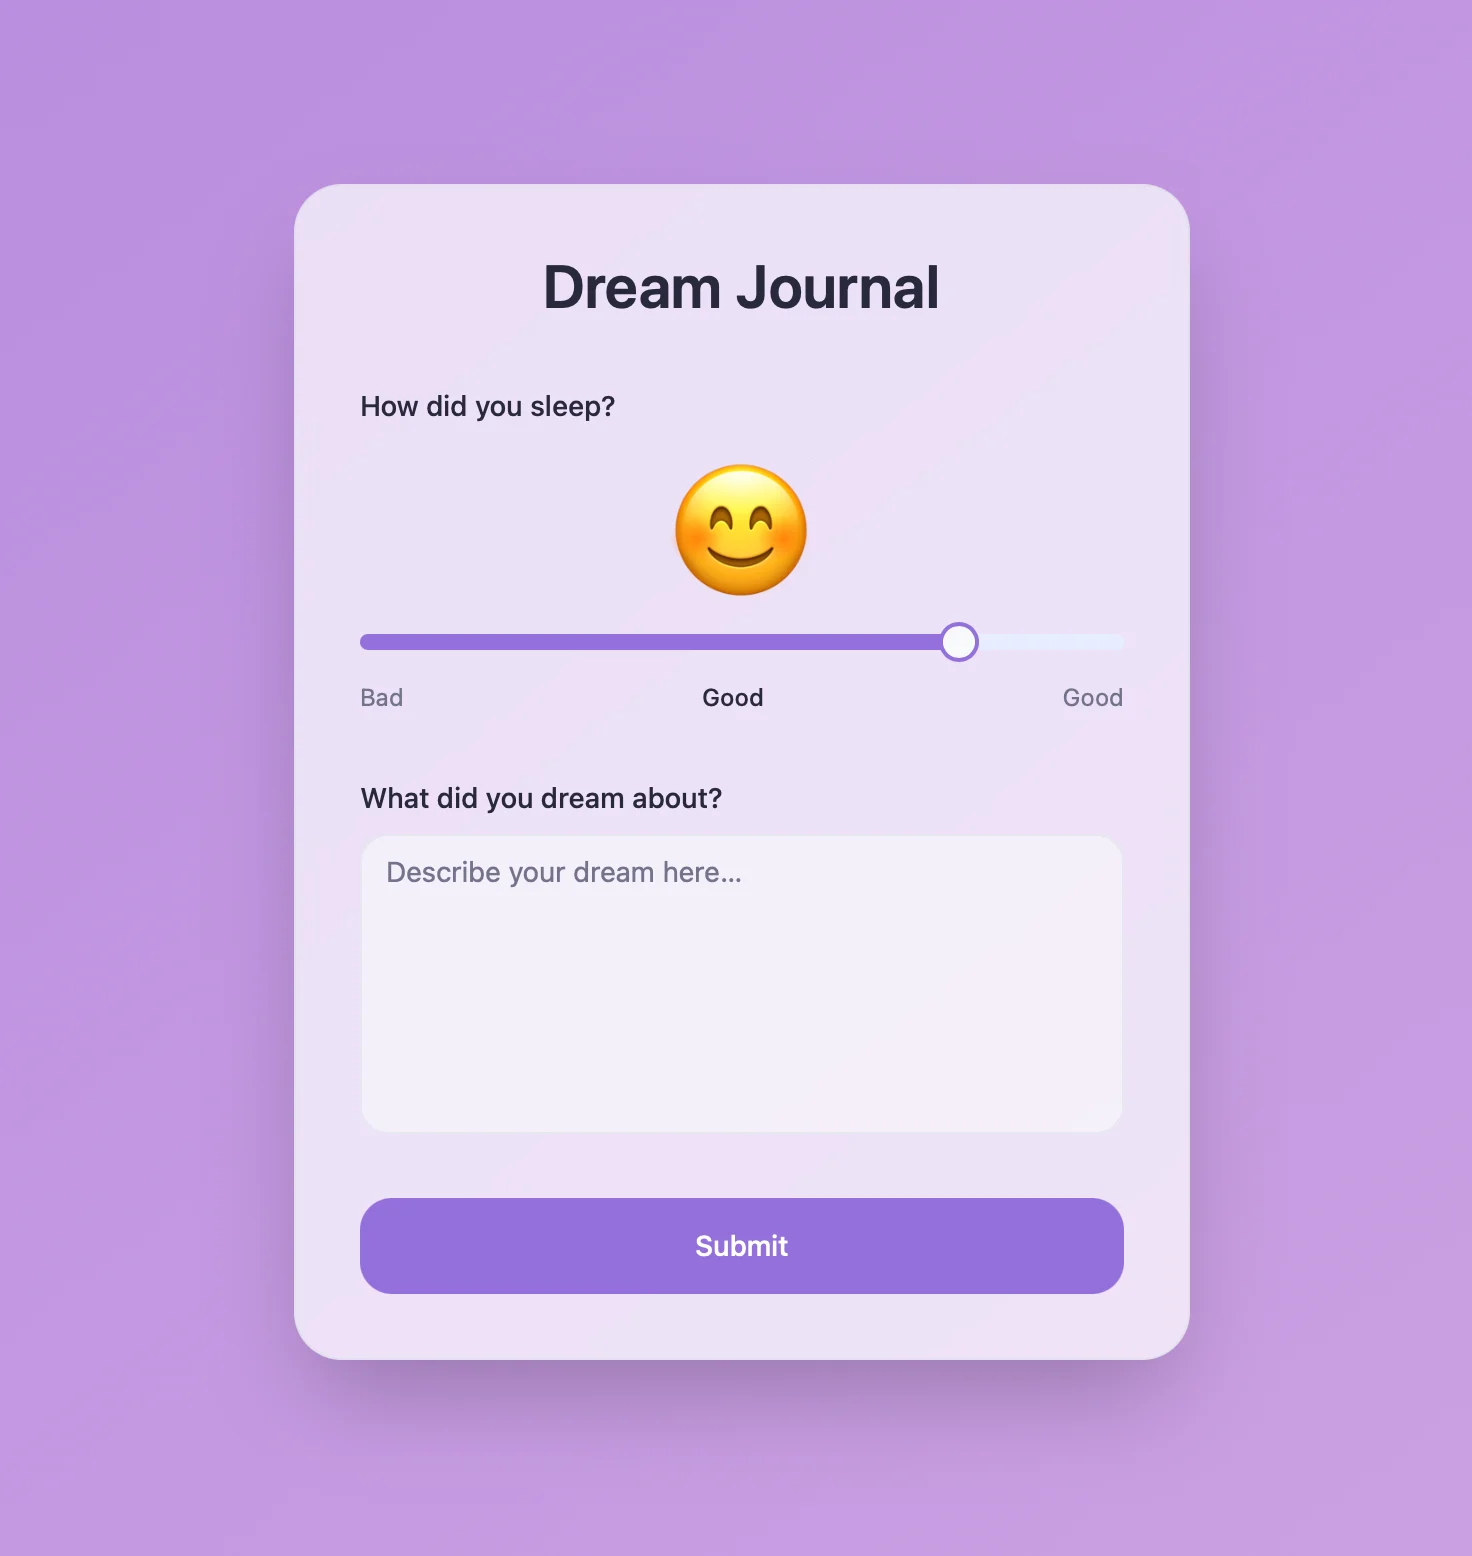
Tôi muốn bạn tạo một trang web hiển thị biểu mẫu nhập liệu để ghi lại giấc mơ và chất lượng giấc ngủ của tôi.
Trang web nên hiển thị ở giữa một biểu mẫu có thanh trượt để đánh giá chất lượng giấc ngủ (từ rất tệ đến xuất sắc). Phía trên thanh trượt sẽ có một biểu tượng cảm xúc thể hiện mức chất lượng, được cập nhật khi thanh trượt di chuyển. Phía dưới sẽ có một ô nhập văn bản để ghi nội dung giấc mơ.
Thiết kế nên nhẹ nhàng và êm dịu. Sử dụng màu sắc trầm và các hình khối tròn, với hiệu ứng chuyển màu nhẹ nhàng cho nền.
Đi đến Lovable và dán đoạn prompt hướng dẫn vào ô nhập liệu. Hãy nhớ đính kèm gói AI Bundle của tài liệu mà chúng ta vừa tải xuống.
Lovable bắt đầu phân tích nội dung gói để hiểu cấu trúc tài liệu và cách sử dụng API. Sau đó, nó bắt đầu xây dựng trang web theo yêu cầu của chúng ta.
Giờ đây chúng ta đã có một trang web tuyệt vời để ghi lại những giấc mơ vào nhật ký giấc mơ của mình! Nếu muốn, bạn có thể lưu ứng dụng web này vào màn hình chính để có thể truy cập nhanh chóng mỗi sáng.
Bước 4 — Cho phép truy cập MCP
Kích hoạt quyền truy cập MCP cho tài liệu của bạn để nhận được URL duy nhất mà các ứng dụng AI có thể sử dụng để đọc và thêm dữ liệu vào tài liệu của bạn:
Bước 1
Bước 2
Bước 3
Bước 4
Bước 5
Bước 5 — Thiết lập kết nối MCP
Bây giờ, hãy sử dụng URL MCP để kết nối với tài liệu từ máy khách:
Bước 1
Bước 2
Bước 3
Bước 4
Để tìm hiểu thêm, hãy xem tài liệu của Claude: “Bắt đầu với Trình kết nối tùy chỉnh bằng MCP từ xa”.
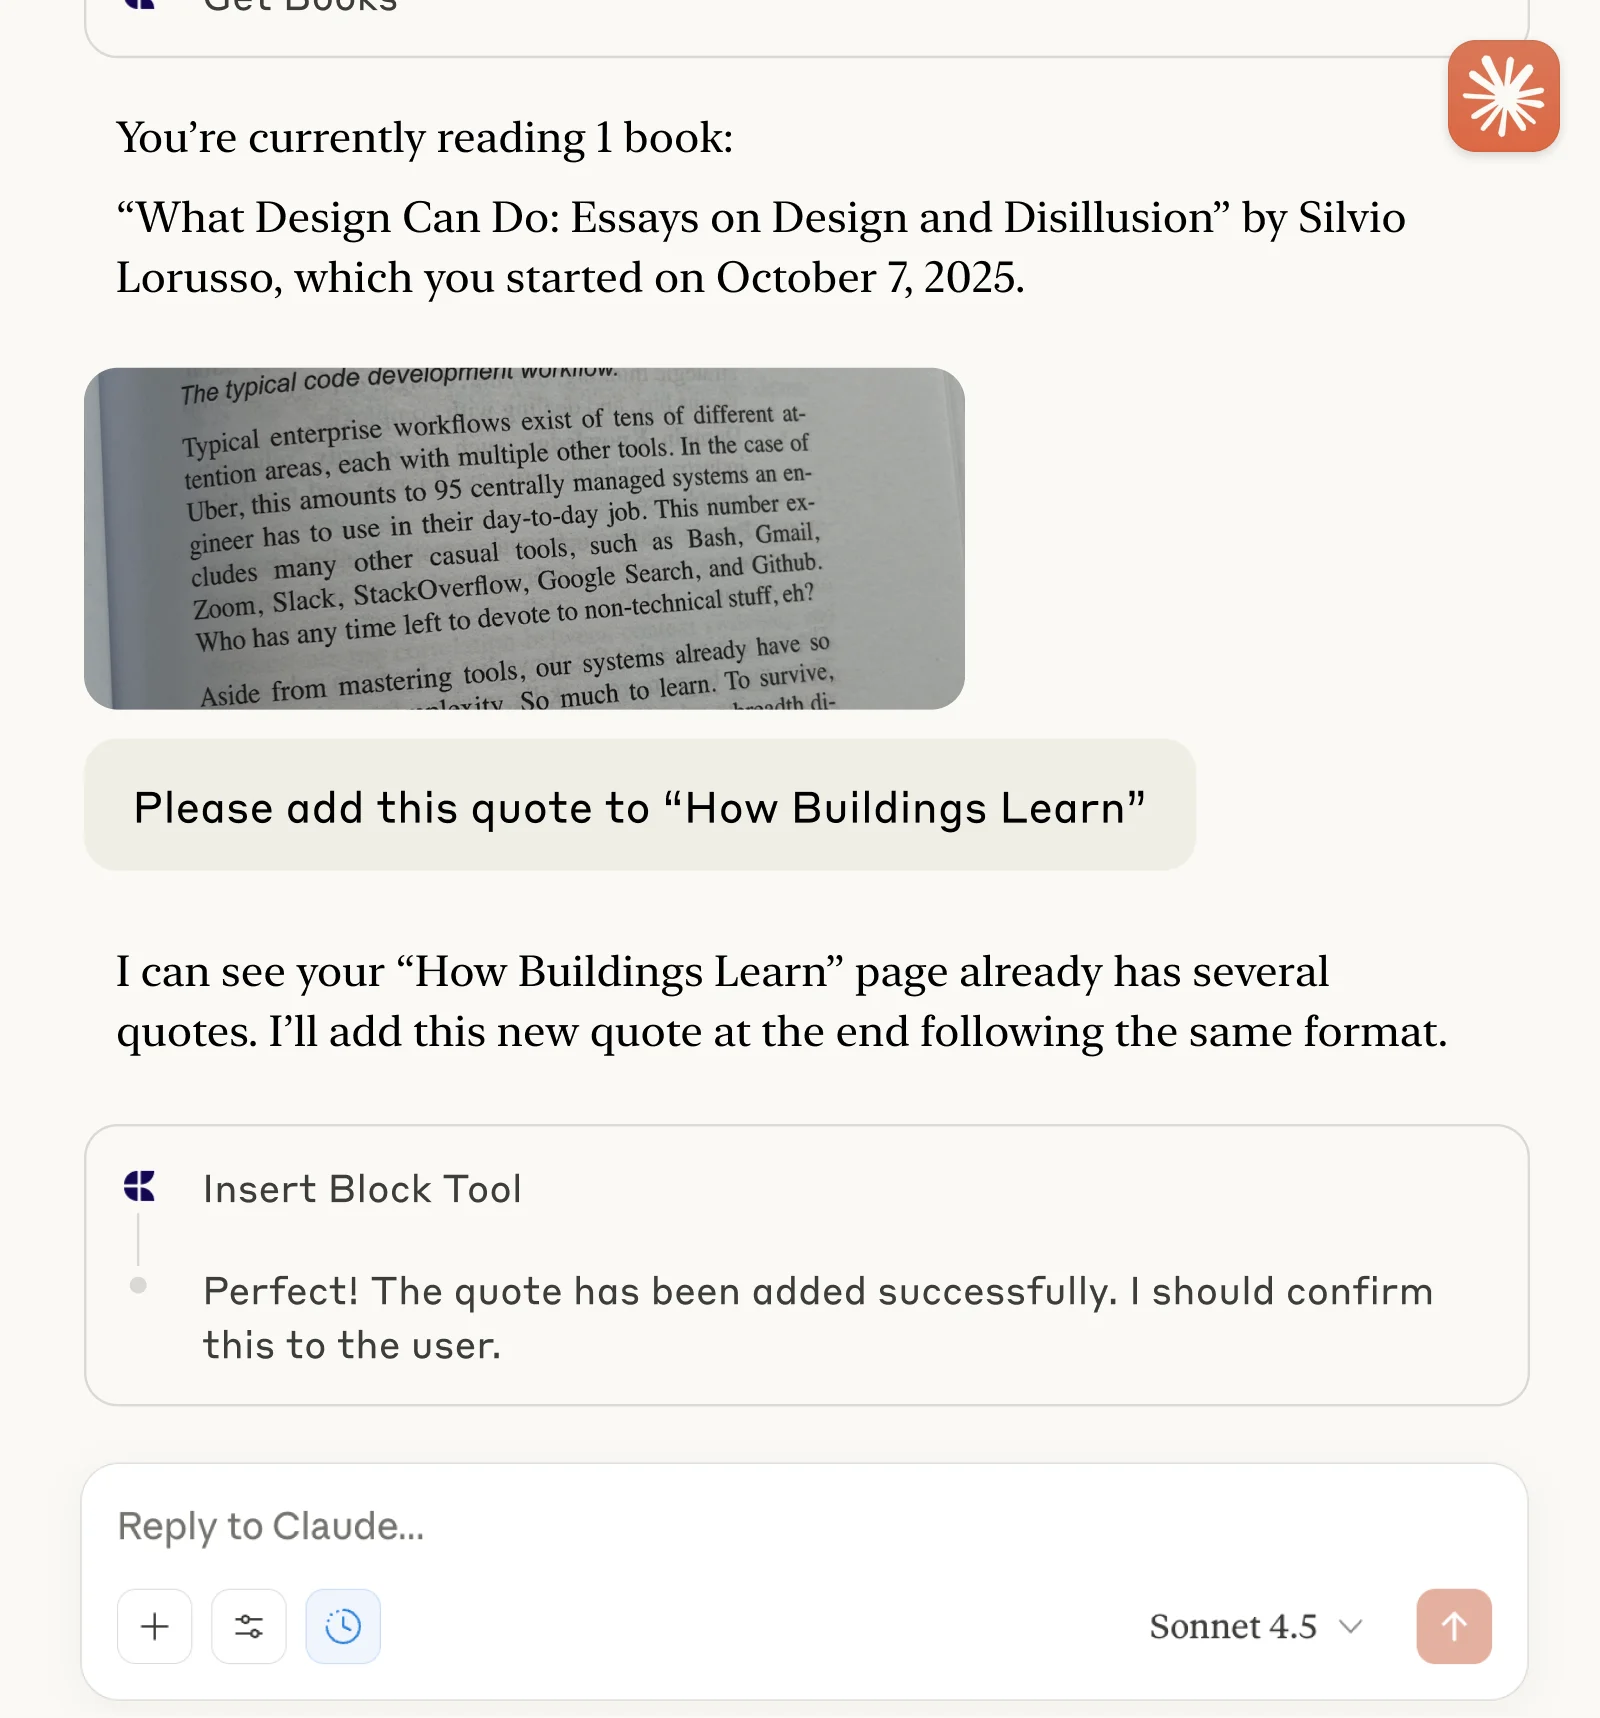
Bước 6 — Bắt đầu tương tác với Tài liệu của bạn
Giờ bạn có thể yêu cầu Claude xem nhật ký giấc mơ của chúng ta và thêm phần giải thích cho những giấc mơ gần đây nhất:
Nhấp vào một ví dụ để sao chép prompt hướng dẫn vào khay nhớ tạm của bạn.