Cómo conectar Craft con Visual Studio Code mediante MCP
Guía paso a paso para conectar documentos de Craft a Visual Studio Code a través de MCP. Lee, busca y actualiza tus notas directamente desde Visual Studio Code.
Añadir un conector MCP en Visual Studio Code
Crea un nuevo conector en Visual Studio Code y utiliza la URL de MCP de Craft para conectar ambos servicios.
Paso 1
> mcp en la paleta de comandos y seleccionando “MCP: Abrir Configuración del Usuario”.Paso 2
craft con un nombre descriptivo para tu servidor MCP.Reemplaza <MCP_URL> con la URL de MCP de Craft.{
"servers": {
"craft": {
"url": "https://mcp.craft.do/my/mcp"
}
}
}Paso 3
Paso 4
Ahora puedes pedirle a Visual Studio Code que consulte tus documentos e incluso que los actualice. Prueba con algo como esto para empezar:
Haz clic en un ejemplo para copiar el prompt a tu portapapeles
Algunas ideas para empezar
Explorar ejemplos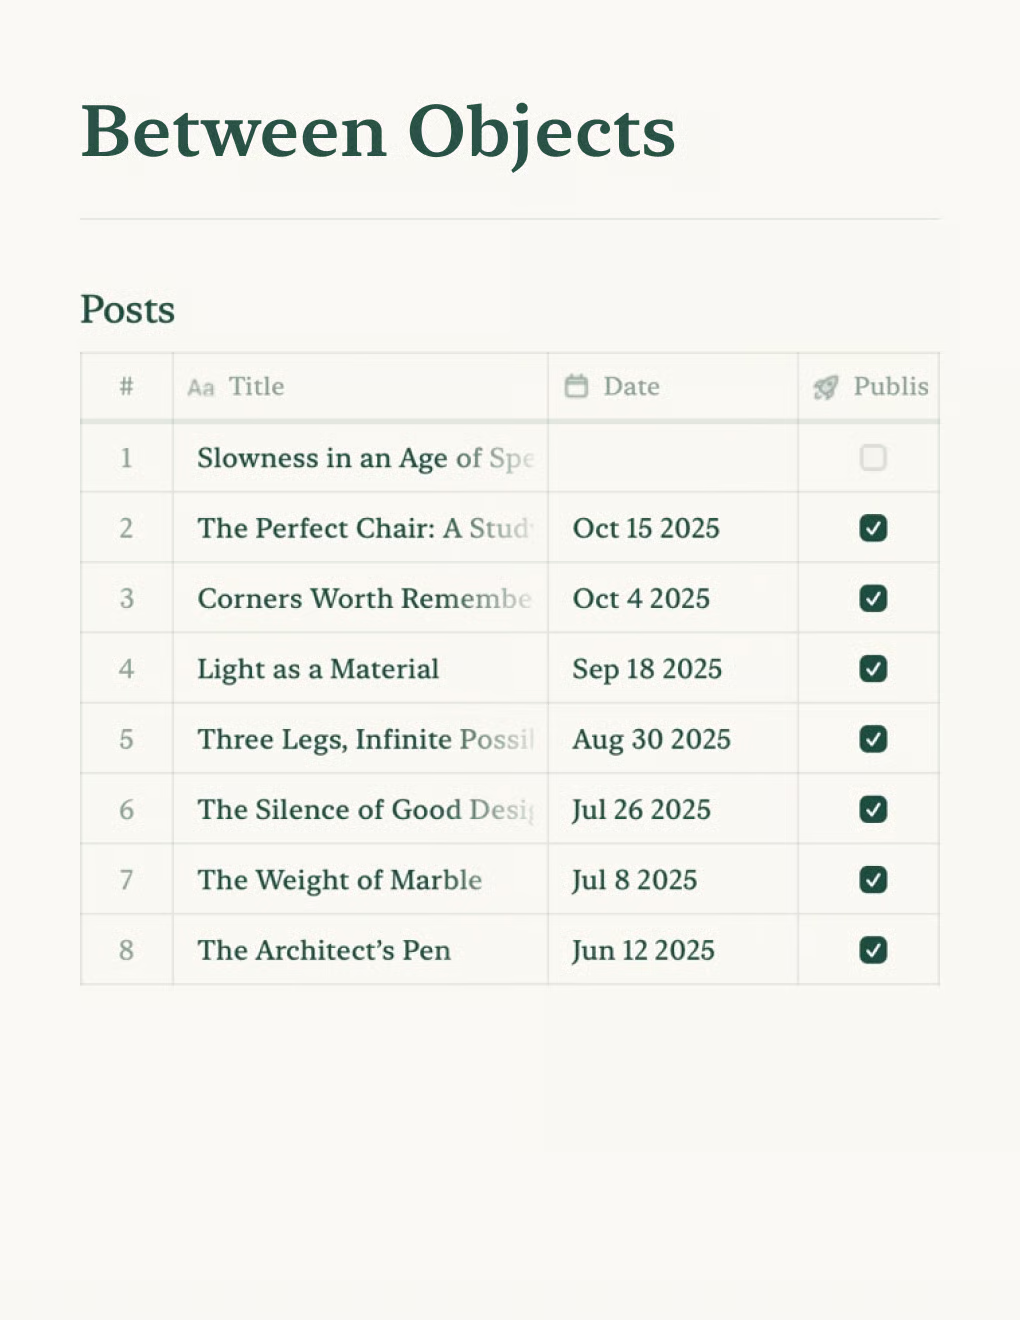
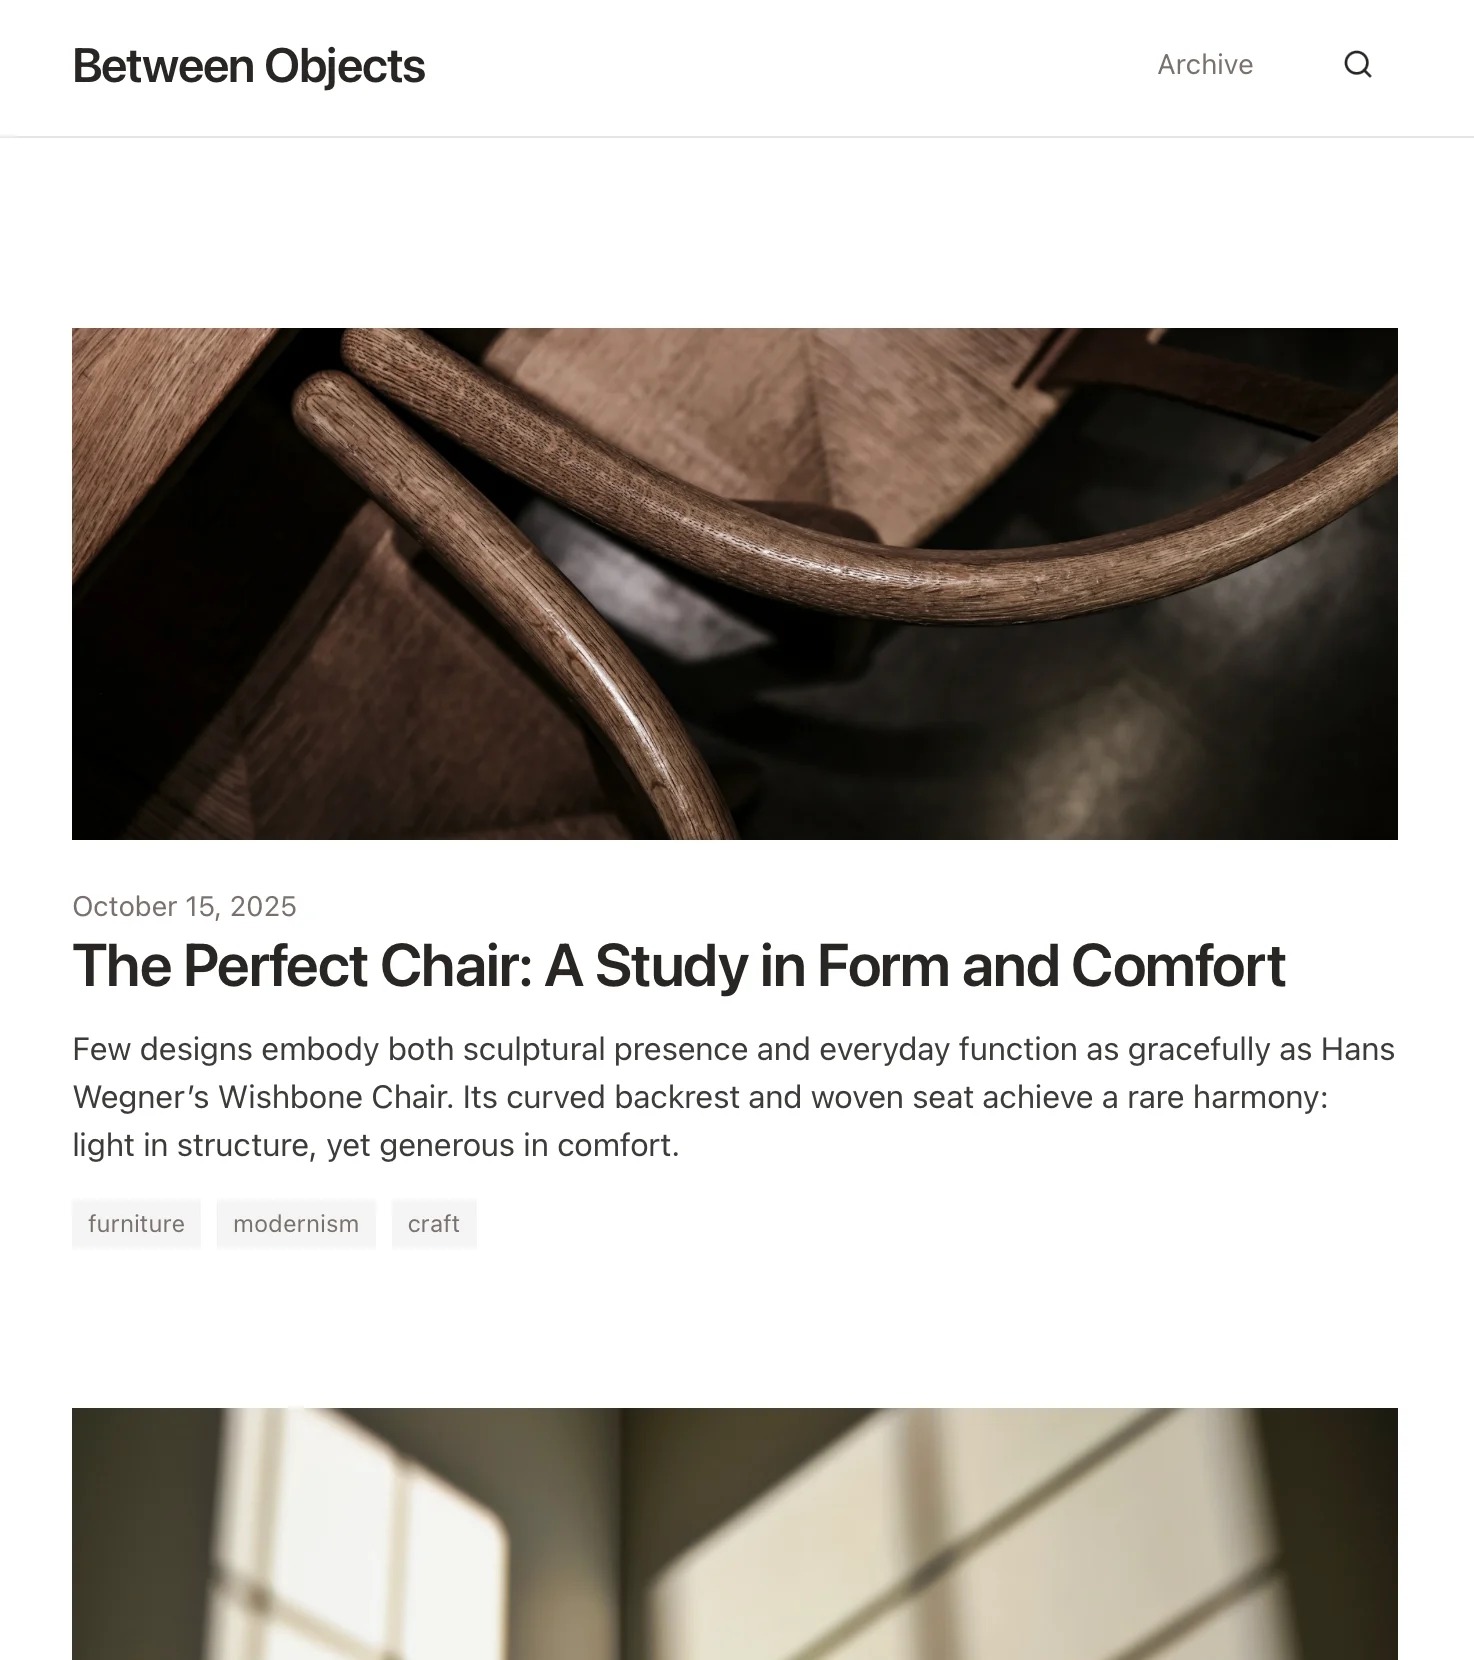
Crea un blog personal impulsado por documentos de Craft. Sincroniza contenido automáticamente vía API — publica desde tu app de notas.
Saber más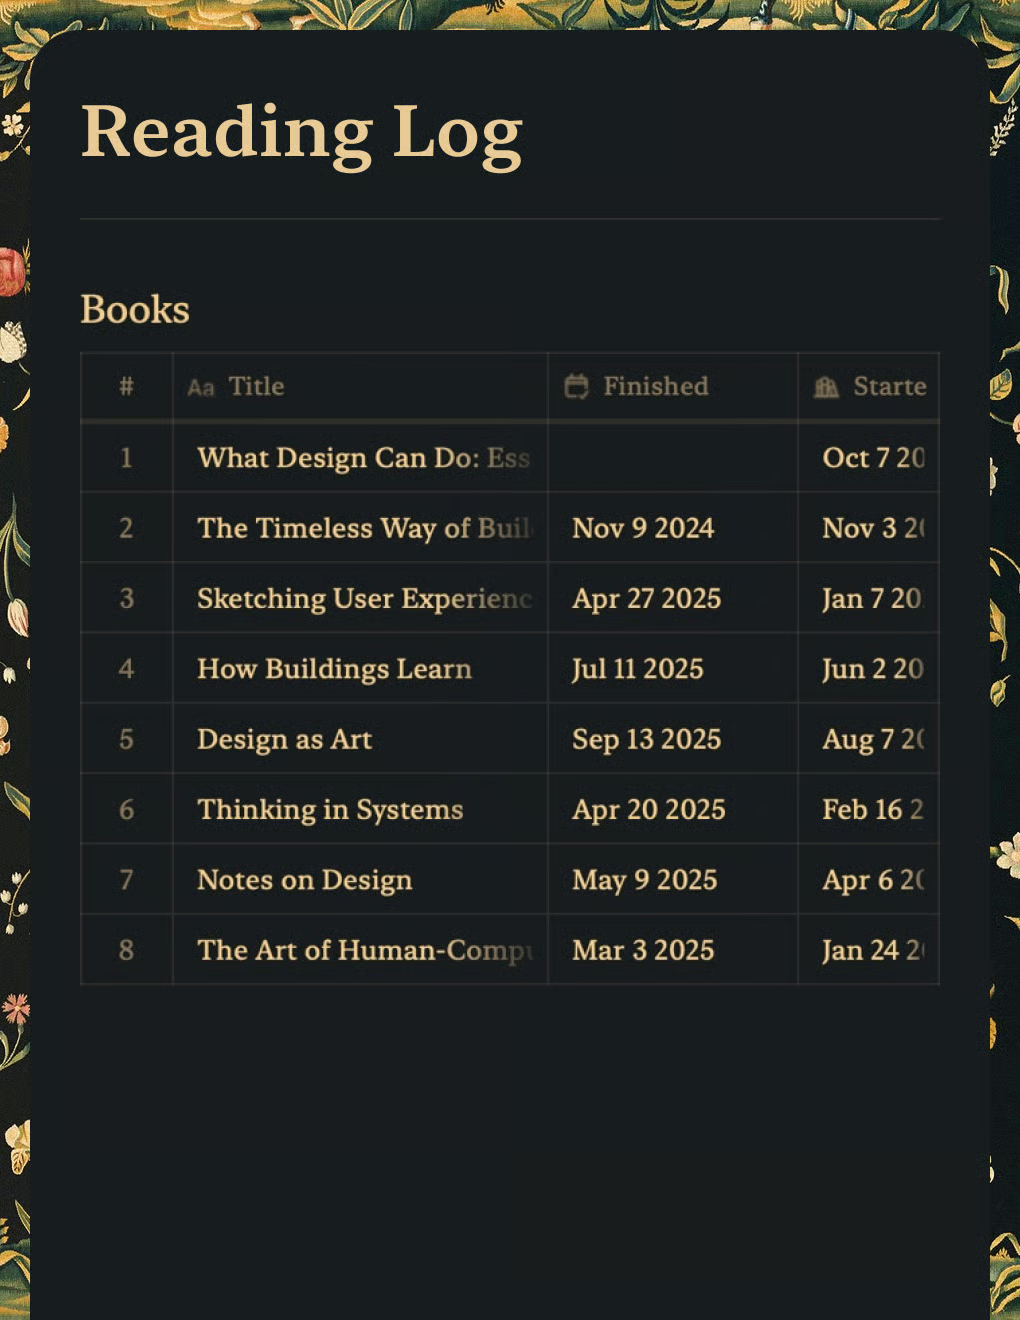
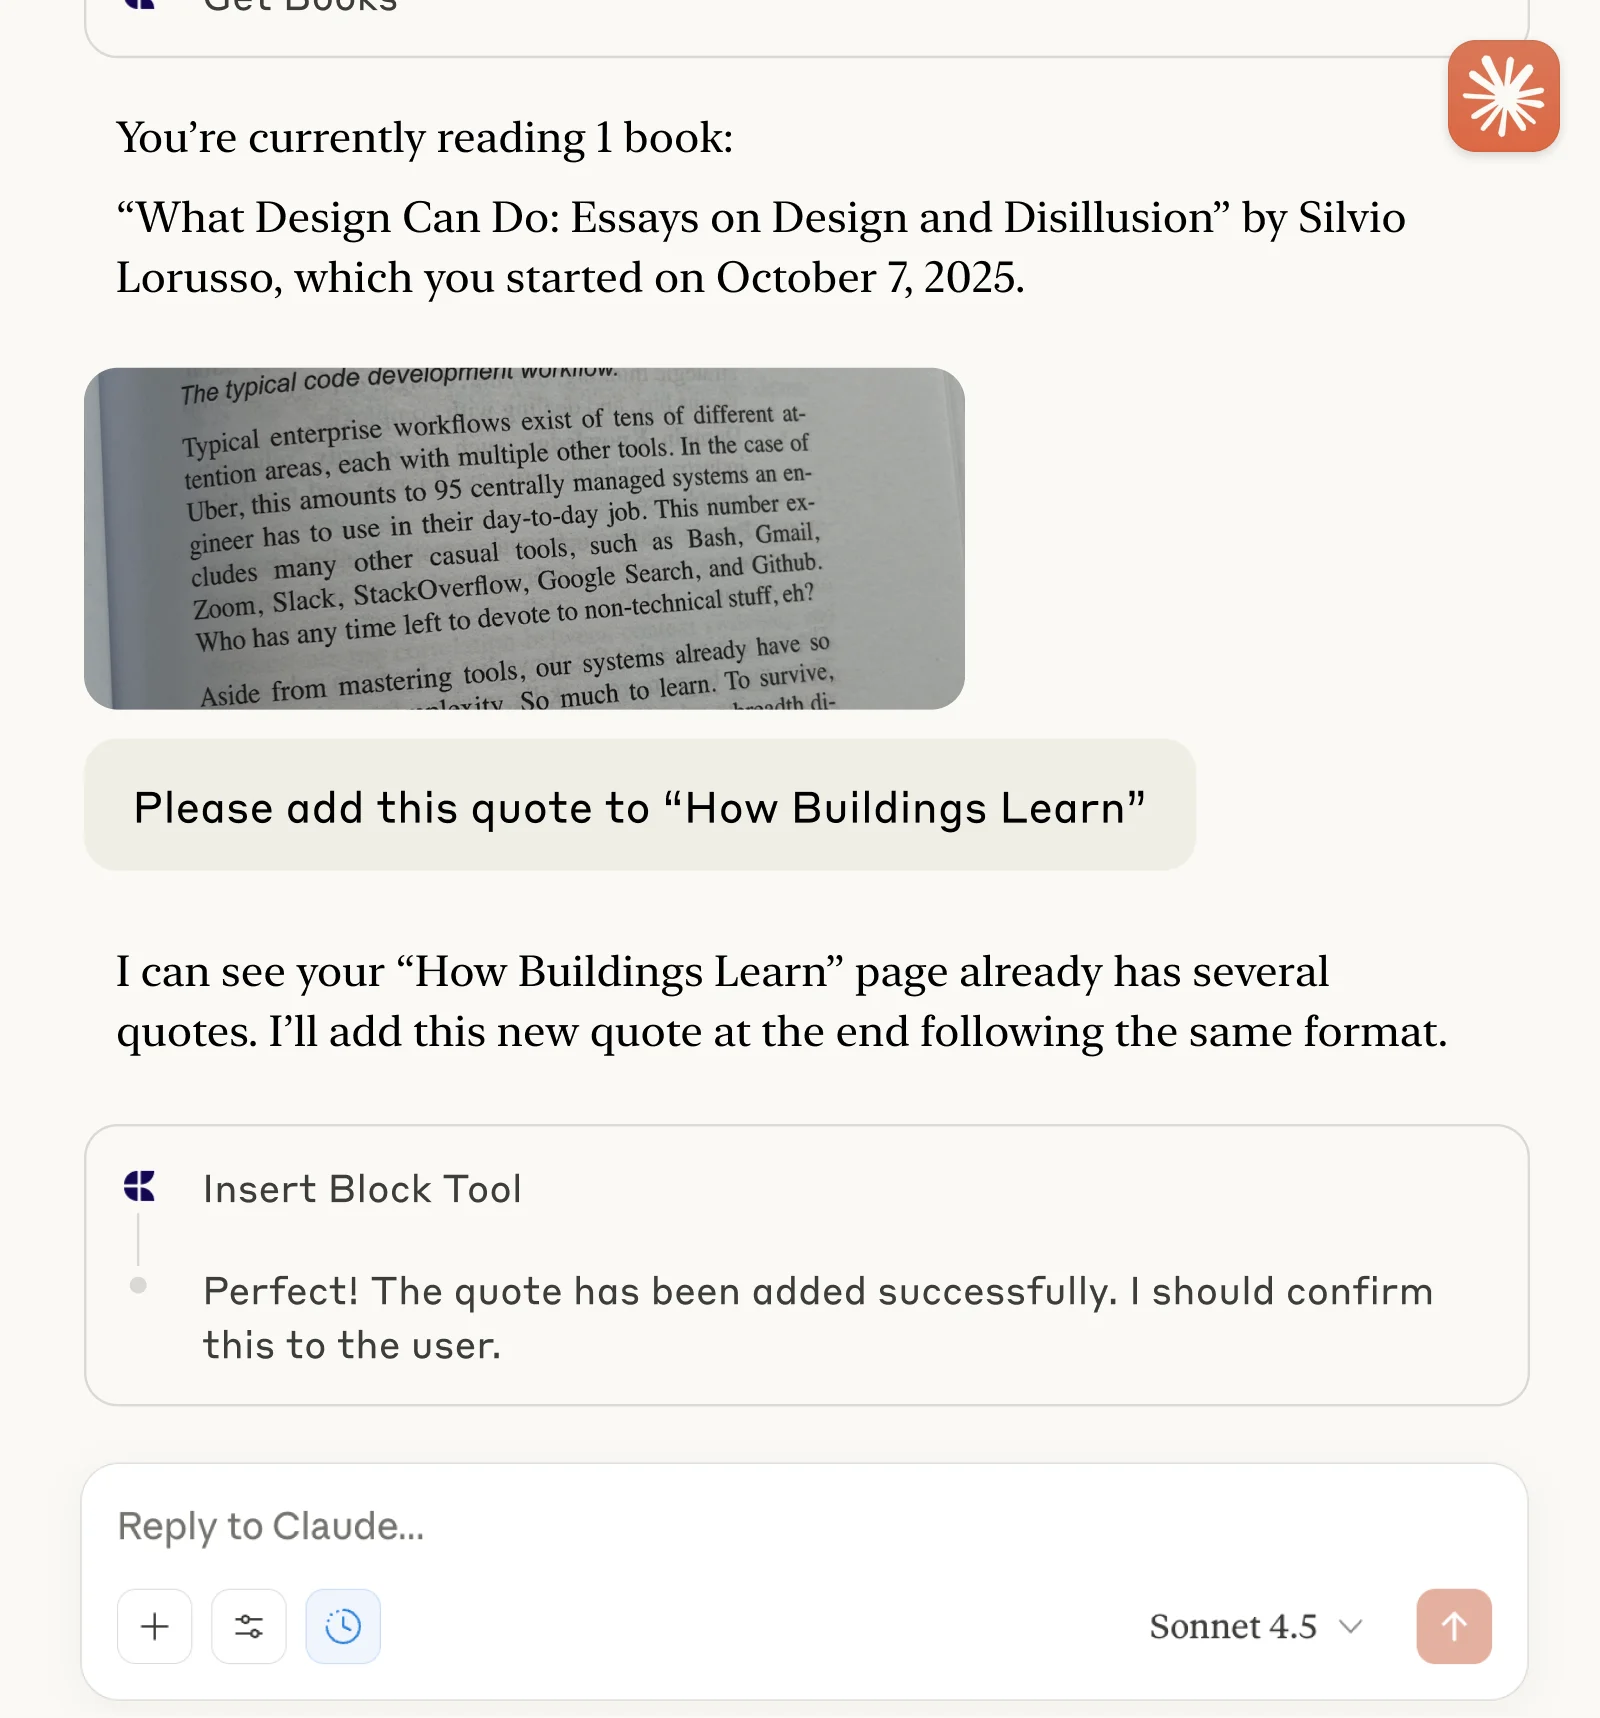
Haz un seguimiento de libros y captura citas con Claude o ChatGPT a través de MCP.
Saber más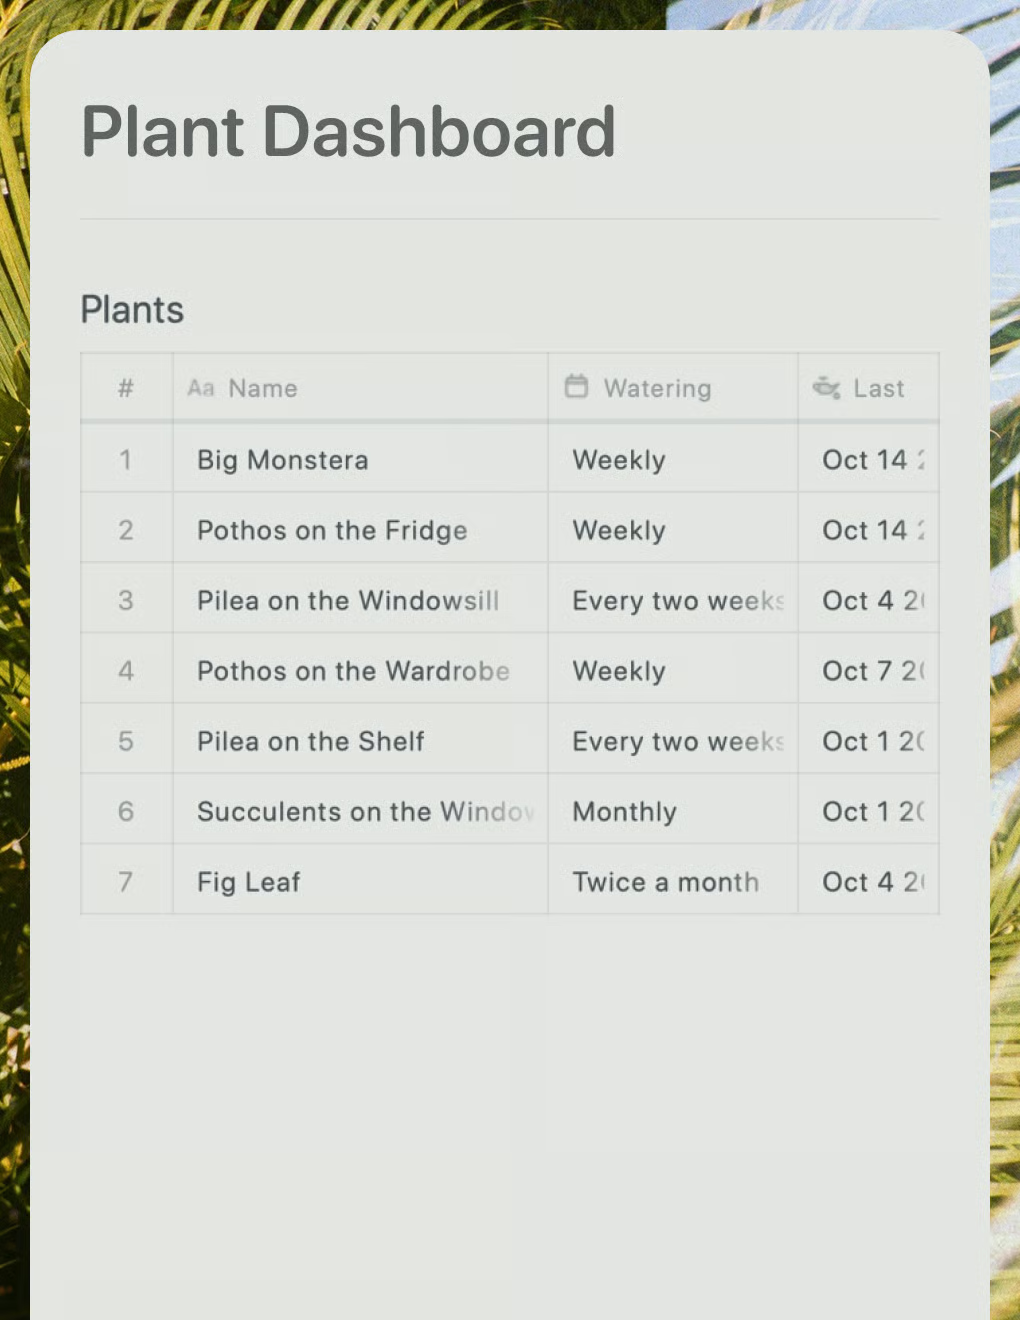
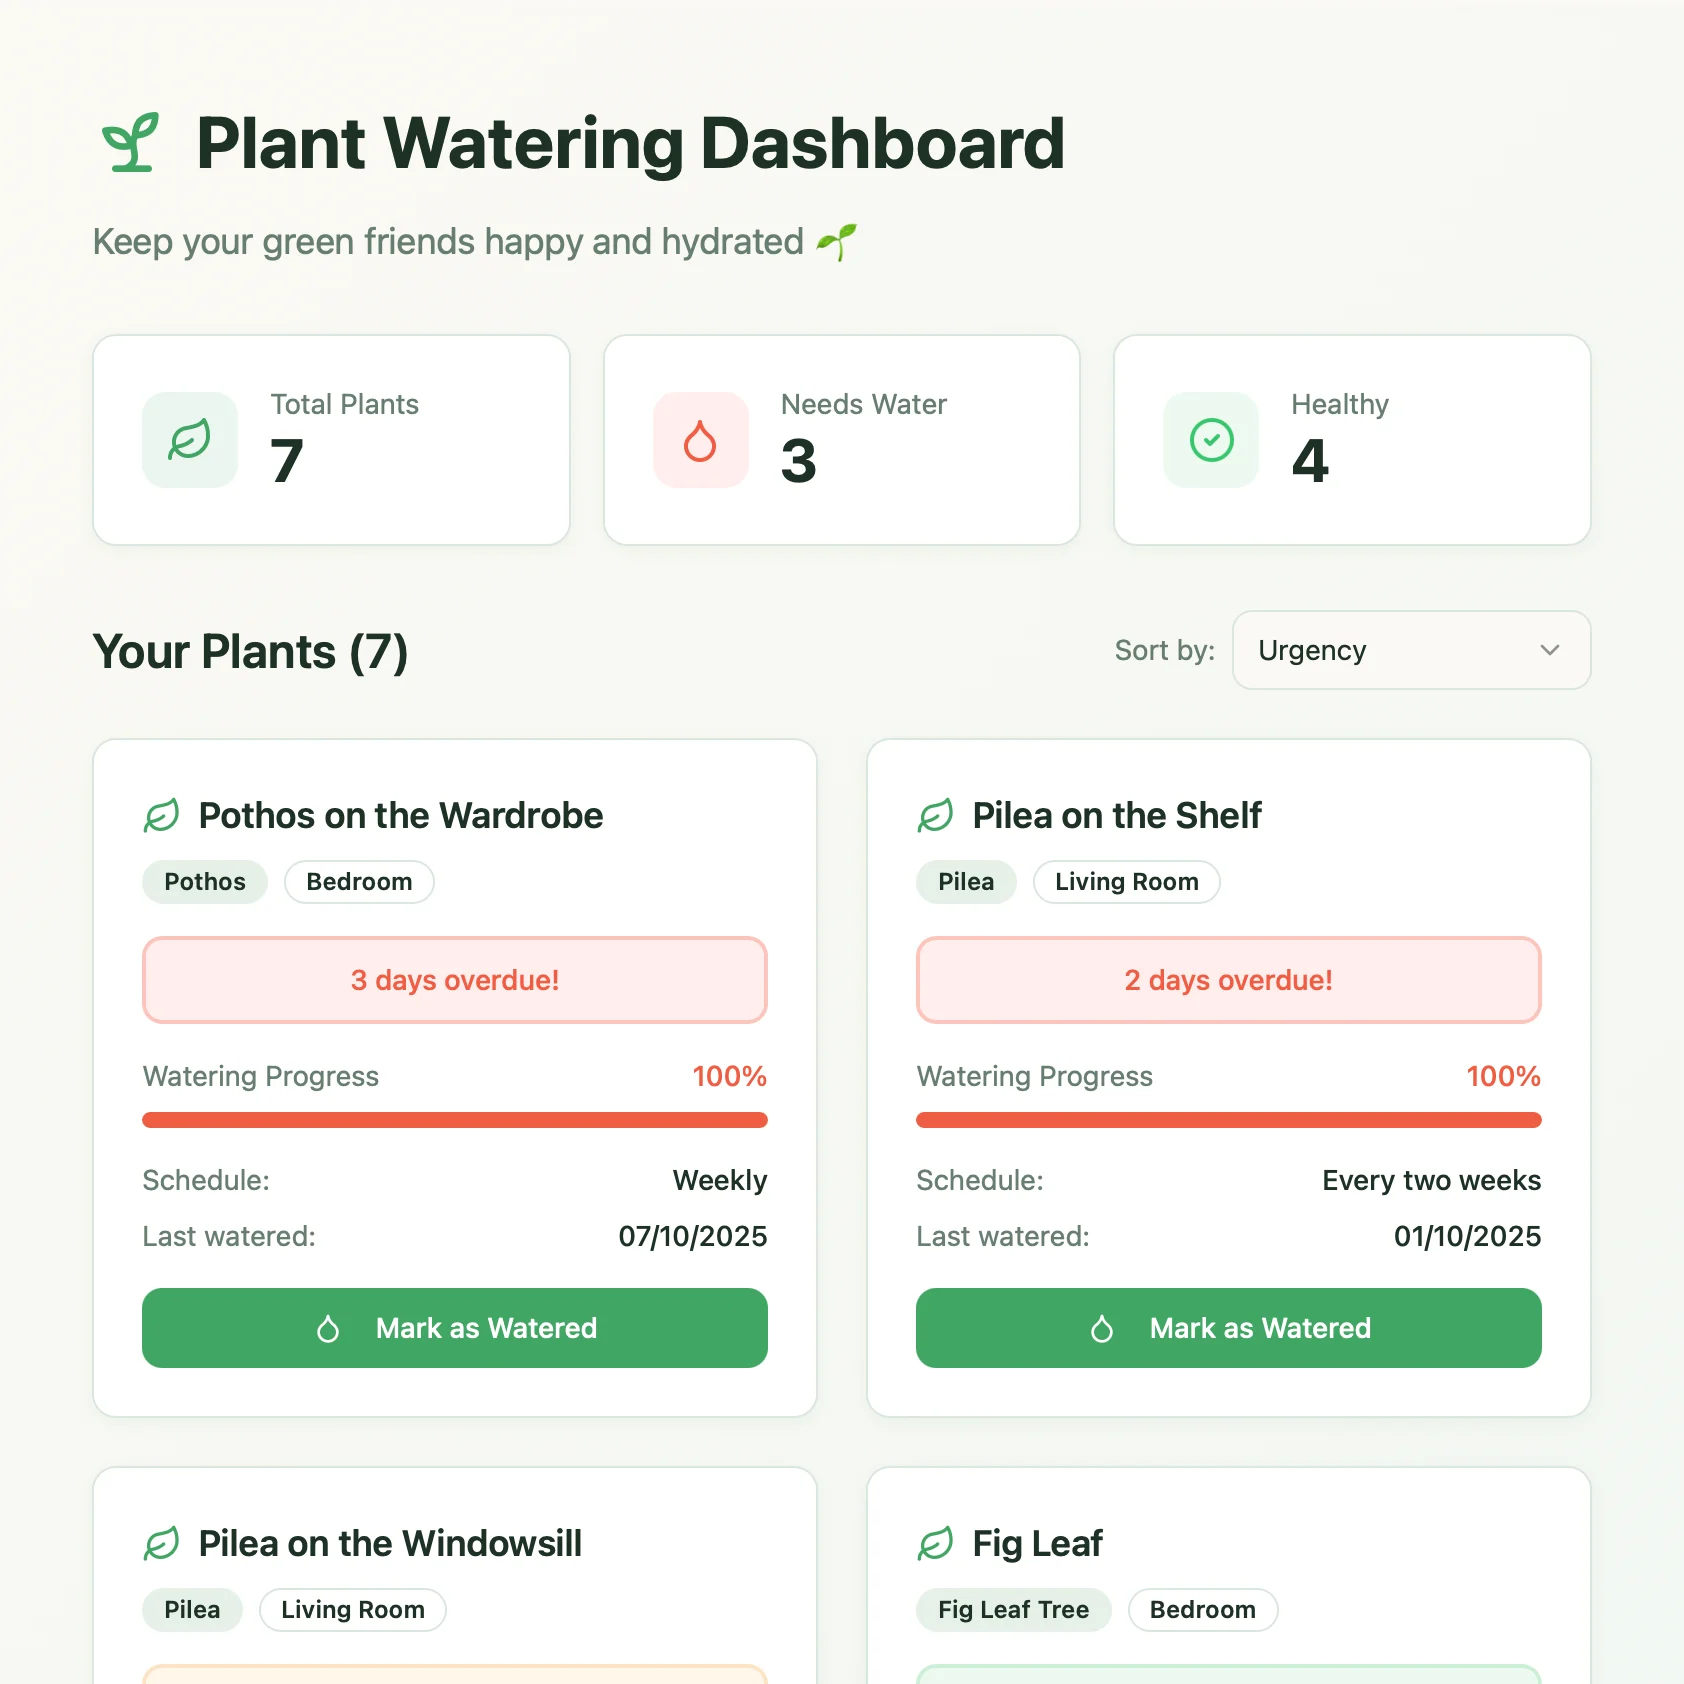
Un panel de cuidado de plantas en vivo creado con Lovable. Extrae los horarios de riego y consejos de cuidado de tu documento de Craft.
Saber más